Created June 3, 2025 by Hanz Makmur
Authorized faculty/staff can create a group and sponsor users’ access to the CS computer system without going through LCSR systems staff. This document shows you how to manage your guest users in a group. If you want a group to share files, the same tool can be used, but this page is specifically about groups that authorize guest users.
How to Sponsor Guests to Computer Science Systems
- Get a NetID
If your guests do not already have a University NetID, they must get one through the Rutgers Guest Request System. There is a link for the guest to make a request and fill in the necessary information. If you sponsor someone, an email will be sent to you for approval. For department guests, the department office will often do this process for you. It would be best if you asked the main office for this. - Add NetID to Your Login group
Once your guest has a NetID, you should go to the Group and Guest management and add that NetID to your group. See Using the Group Management Tool section below to learn how. - Access for iLab Cluster?
If you created a loginable group for your machines, access is only given to machines in your group by default. If your guest needs access to iLab resources, ensure your group allows members of the group access to iLab clusters.
- Tell the user to Login the CS iLab Account
Once you gave the access, your user should be able to login and account gets activated automatically.
Annual Review of Guests by Sponsor
Please note that to simplify the cleanup process, there is a yearly review requirement, which is when the group owner must review the group membership. At this time,
- the sponsor is emailed asking for a yearly review.
- A second message is sent if there is no response for two weeks.
- After two more weeks, with no response, a third message is sent, and the group is suspended.
- Once suspended, group members will get a warning email that their account on the cluster specified in the group will be closed within 30 days. In addition, members can no longer log in on a specialized system.
Using the Group Management Tool
To start managing your users and groups. You need to log in with your NetID and CS Password.
Depending on what groups you already own, once you log in, you may be presented with a list of groups you own. Shown below are example Groups.

Different Types of Groups
As shown above, there are three different types of groups.
- The conference is a suspended group. Members of this group cannot log in to any cluster until the account member is reviewed.
- cs431-ta is a file-sharing group only. Filesharing group allows you to share files or directories with the group. See Making a Directory You Can Share With Members of Your Project for more details.
- login-ilab-gpu is loginable group. Members of this group can log in to the cluster assigned to the group.
Making changes or reviewing your group
To review or change your existing group, click on the group’s name. Once clicked, you will see a familiar screen, which is the one you use to create the group. Make the changes you need and click on the submit button.
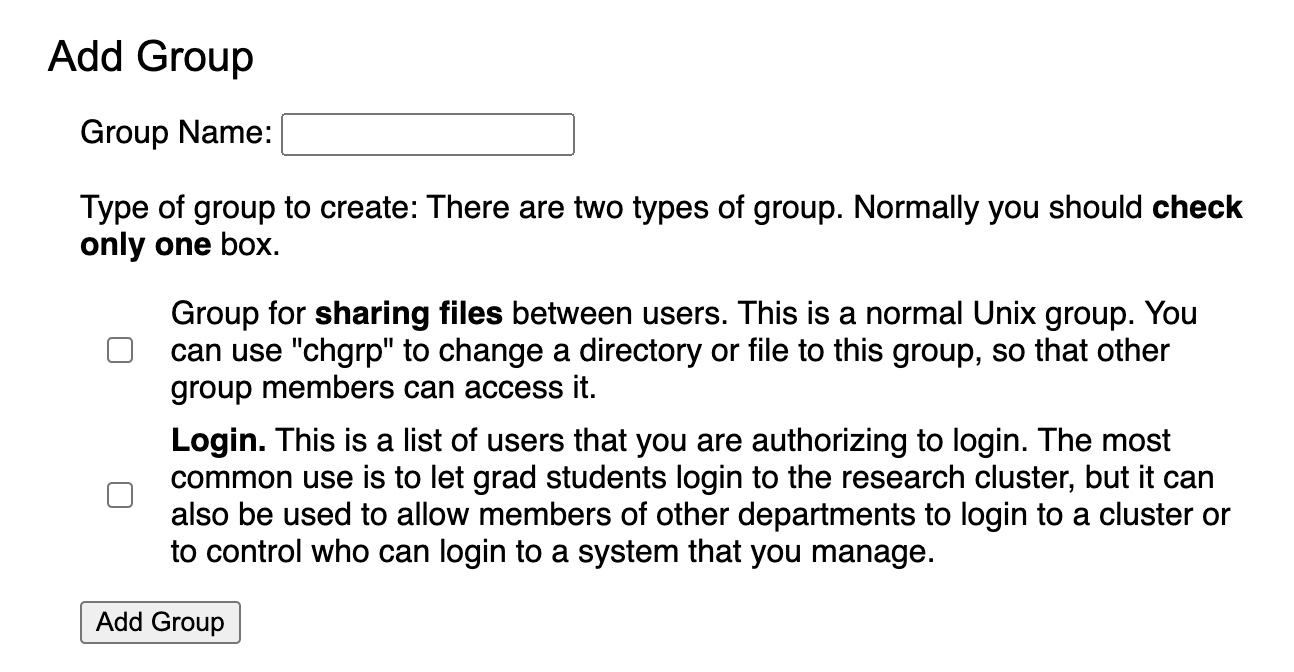
Adding a group.
If you have no existing group or would like to create a new group, go to the Add Group section and add a new group.

Adding a login-able group
If you want a group that can be used to log in to your group machines, create a loginable group by checking [x] Login when adding a group to manage your users and groups page. Once this group is made, please notify us to use this loginable group to limit your machines to your groups.
Giving your guest iLab access
If you want your guest to login to iLab machines, you should look under Cluster and check the iLab check box as shown below.

For more introduction information, please refer to your guests the following info:
– Getting Started with Technical Resources at the Department of Computer Science
– Introduction to Computer Science Resources
For help with our systems or immediate assistance, visit LCSR Operator at CoRE 235 or call 848-445-2443. Otherwise, see CS HelpDesk. Don’t forget to include your NetID along with descriptions of your problem.
