How To Print Posters To Poster Printer: Artisan
Enforced Restrictions
- Only CS Faculty/Grad/Staff NetID can print to this printer. This means that if your username on your computer is NOT CS Faculty/Grad/Staff NetID, you can’t print. In order to print, you must authenticate with your NetID credentials.
- Poster printing is expensive. Don’t waste! Proofread before printing! For example, printing a 36″ by 48″ poster at Staples currently costs $ 66 + tax + 2 weeks’ wait + shipping.
- There is a limit of 1 poster/per 30 minutes and 5 posters/per day per NetID. To print again, you have to wait at least 30 minutes. Any jobs printed before their allowed time are ignored.
- You can cancel the job via lprm command. For example:
lprm -Partisan your_job_id.To find out the job_id, you need to typelpq -Partisan
Important Notes
- The printer will always say No Internet Connection. This is normal because it is not accessible from the Internet (outside RUNET).
- Do not do anything to the printer. If the paper ever got ejected, it would take 30 minutes to feed it back to someone who knows how to load it.
Printing Recommendations
- Before printing, ensure your document is the same size as the poster size. Preview your poster in PDF so you know you are getting the correct quality when printing on large-sized paper.
- Scaling up and printing an 8.5 x 11 PDF document to a 36×48 paper will give you poor-quality output; don’t do it. It is a waste of time and resources.
- Always Give Yourself More Time. Don’t expect to get your poster done the day it is due. 100% of users who never print posters do NOT get it right the first time.
- We do not print anything for users; you must print your poster yourself.
- Set up and learn how to print a poster days before you need it.
- Do not wait until the last minute before printing your poster.
- Poster printers often run out of ink or paper, so print during work hours. Supplies may run out or need to be reordered, and no one can help you.
- Your job refused to print because of an incorrect setup.
- The poster printer could be jammed.
- Someone ejected the role paper, which takes a long time and is hard to reset.
- Poster printing is slow. Others may also have the same deadline as you.
- Etc.
Printing a Poster from Linux OS
- To print a poster, you need to log in to a Linux machine with a graphical user interface.
- If you are on a laptop, first transfer your poster.pdf file to your iLab home directory. You can learn how to transfer files to and from a Linux machine by visiting the Accessing Files Remotely page.
- Open a web browser session to weblogin.cs.rutgers.edu. For more information, see Using CS WebLogin to Access iLab Machines.
- Once you have a session open on one of the iLab machine,
 find and open for Atril document Viewer to print your poster. [We recommend Atril because our last test showed that Evince, the default Linux Document Viewer, has a bug that prevents you from setting the correct paper sizes.]
 - Once Atril Document Viewer is running, go to the File menu and select Open to open your poster pdf file.
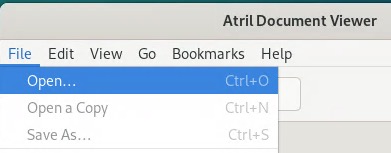
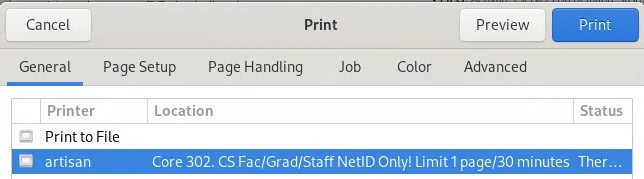
- To print your poster, go to the File menu and select Print. A list of printers will open. Select artisan. This is the poster printer.
- Click the Page Setup option on top and select Arch E paper size.
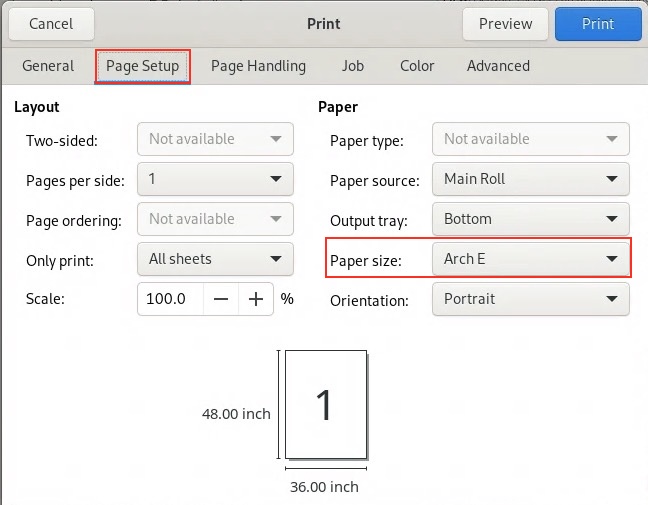
- Click Preview your job before printing. Ensure the preview shows the correct print size on the correct paper size.
- Click Print to print your job. You may be asked to authenticate with your NetID credentials.
For help with our systems or immediate assistance, contact the Operator on Duty at CoRE 235 or call 848-445-2443. Otherwise, see CS Helpdesk. Don’t forget to include your NetID along with descriptions of your problem
