by Hanz Makmur – March 2018 – Updated Aug 30, 2023
Quick Guide to Core B (CoRE 305) Video Conferencing Tools
IMPORTANT:
- Access to Core 305(CoreB) room requires your Rutgers ID card. All CS Faculty/Staff and Graduate students have access to this room. See the Keys and Keycards page to get access.
- Room Reservation is required.
- Before using our conference room, please familiarize yourself with the equipment in the room at least a few hours or a day before your presentation.
- Please DO NOT UNPLUG any equipment.
- If you need immediate assistance, please call 848-445-2260 or go to CoRE 230 or CoRE 211. Otherwise, see the CS HelpDesk.
Using TV and Podium Computer for Your Local Presentation or Classroom
The 80-inch TV display in Core 305 is connected to the podium machine running Windows 10 OS. It auto-logs into an unprivileged user on boot. DO NOT shut down; DO NOT LOGOUT after using. Just leave it as is. If you find the machine is locked with a password, reboot it.
Wirelessly Projecting your Laptop to the Podium machine (no longer supported)
The podium machine in Core305(CoRE B) can wirelessly cast your laptop screen.
Option 1: Connecting Apple  Devices Wirelessly
Podium Computer in CoreB supports Apple AirPlay Technology. This means you can send audio out and wirelessly project your Apple device screen to a projector and TV in our conference room.
In this setup, you will:
– Wirelessly via AirPlay, send your Apple device Audio/Video to the Podium computer
– use Podium computer for Zoom audio/video session
– use your laptop for your slideshow in another Zoom session.
– You can use your laptop microphone or a microphone connected to the Podium Computer.
To connect via AirPlay, follow these steps.
- Turn on the TV in the room. You will need to press the
 power button at the bottom-center of the TV and press the power button on the TV Remote.
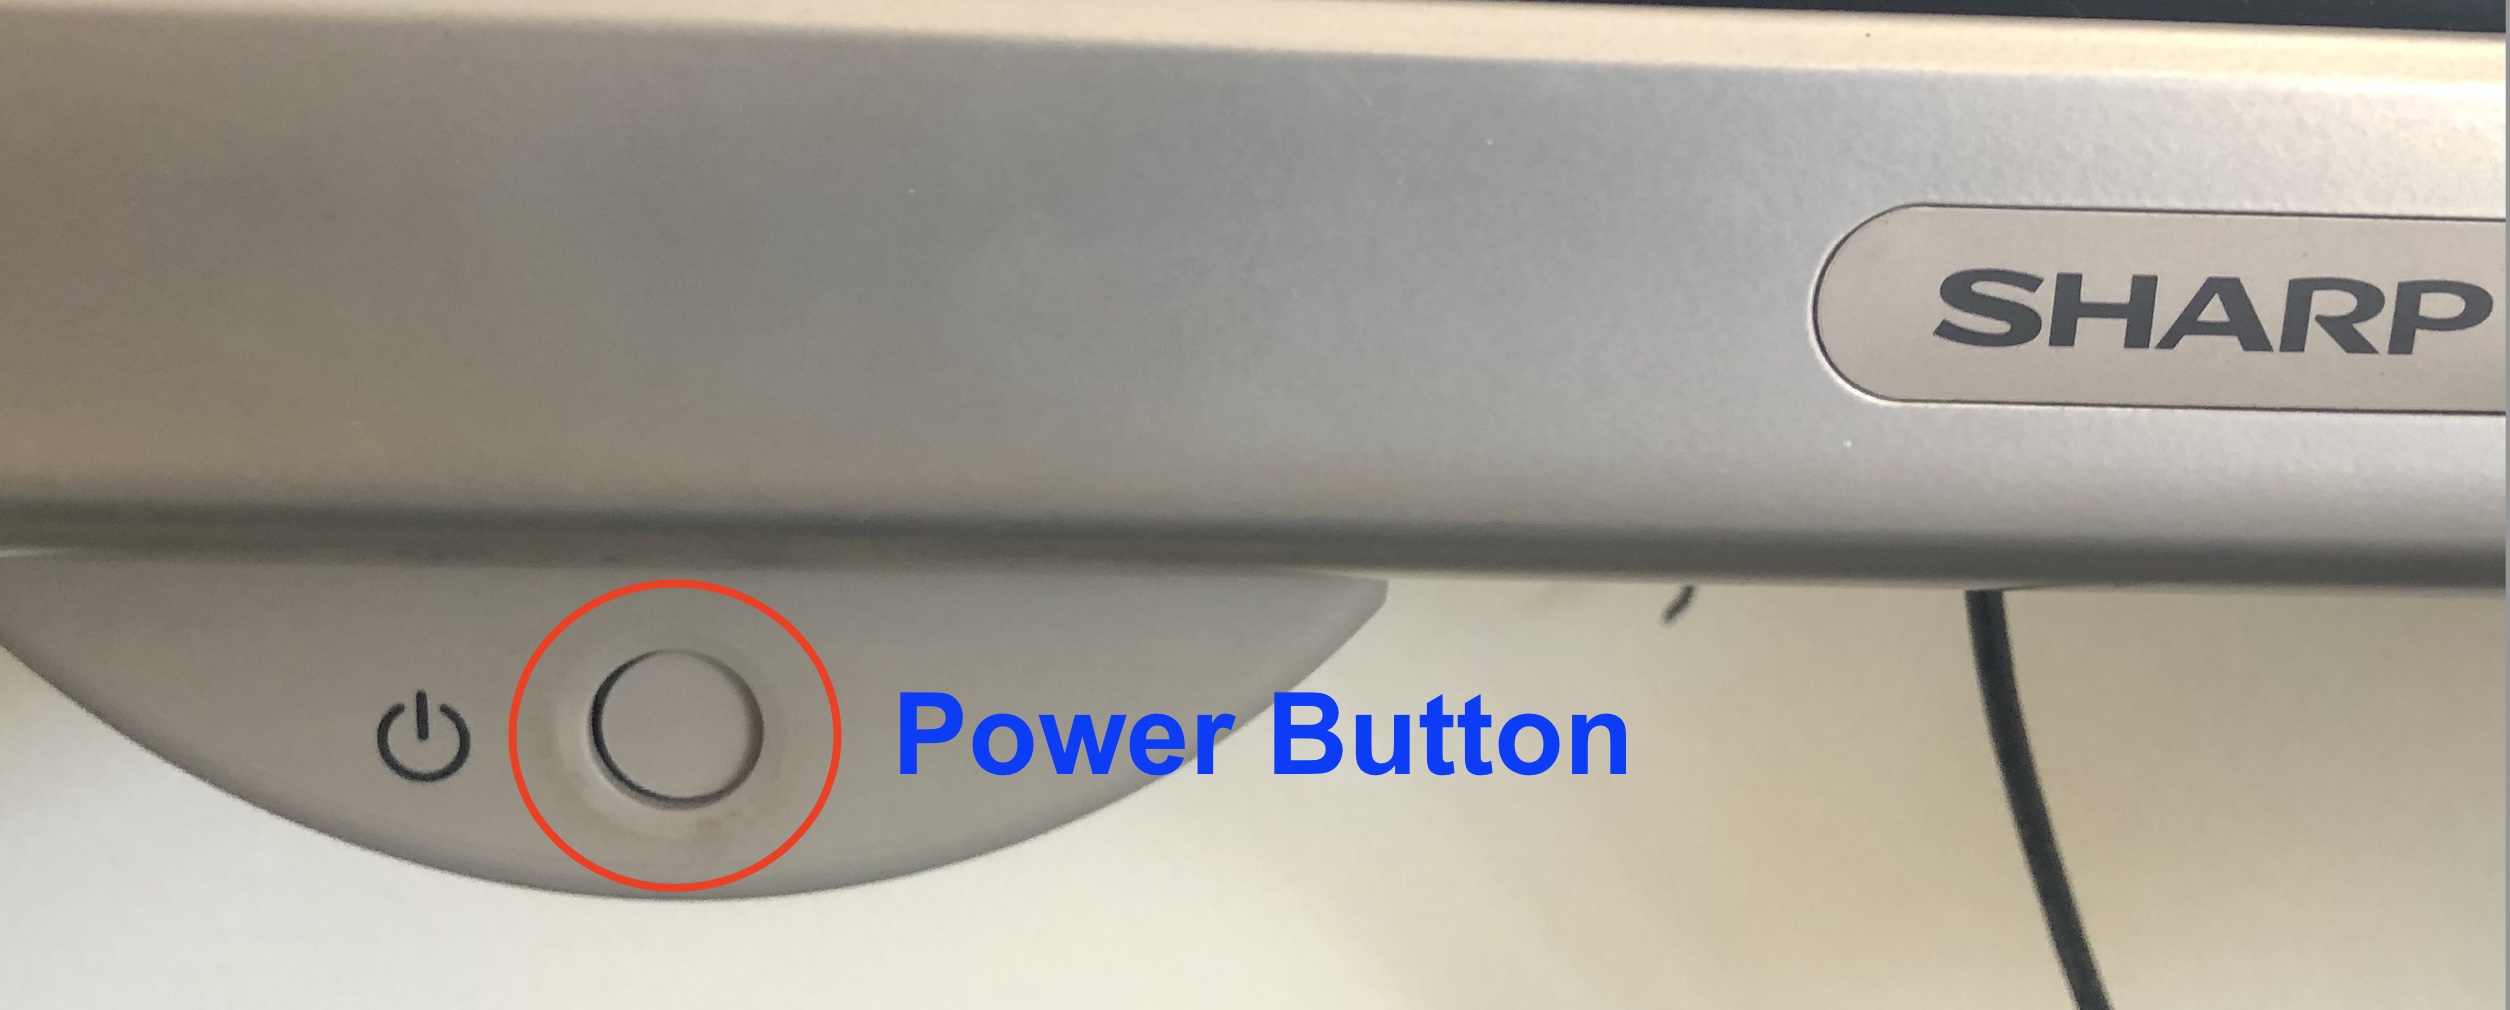
- Once turned on, you should see the Podium computer screen displayed on the TVs and projector.
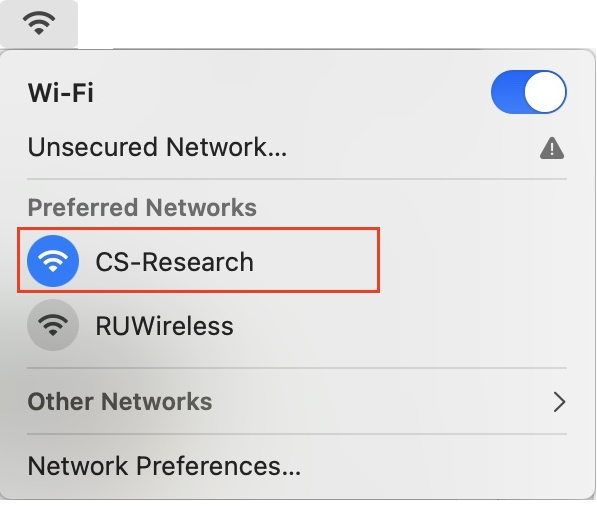
Connect your Apple device to WiFi. When selecting CS-Res, search your browser will open, asking you to authenticate. Ignore this window if you don’t need access to the Internet; otherwise, you need to authenticate. Please note that your device has to be set to DHCP without present DNS servers to make this work.
- Connect to the AirPlay server as follows. – If you are on iOS, follow the instructions on Using the AirPlay of your iOS.
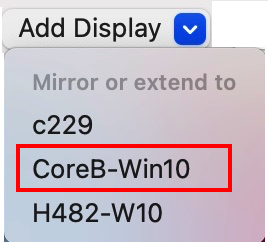
– If you are on a MacOS, look for the AirPlay status icon in the menu bar. – If you don’t see it, click the menu at the top-left corner of your screen and select System Preferences/System Settings menu. This will open the Preferences Window. – Look for the Displays icon and double-click it to open your Displays setting. – Look for or menu at the bottom-left of your Display settings windows - To connect to the AirPlay server, which is the Podium computer, click on
- A PIN will be displayed on the screen; enter the PIN on your Apple device to connect.
- Currently, your MacOS/iOS screen should be projected to the Podium screen, TVs, and Projector. If nothing shows, disconnect and redo step 5. Your MacOS/iOS audio is also sent to the Projector and TVs in the room.
- Go to the Podium computer and open the Zoom app.
- Share the AirPlay screen to Zoom users to see. If you want everyone in the room to see only your shared laptop screen, set it to full-screen mode on the Podium computer. To get out of full-screen mode, press the ESC key.
- With this setup, you can wirelessly control your slides from your laptop while using all Core B equipment (Camera, Mic, Speaker, TV, and Projector). Important: If you are using iOS, do not use YouTube App while in mirror mode. Use YouTube from a browser instead.
- Turn on the TV in the room. You will need to press the
Option 2. Connecting Windows10/11 OS Wirelessly
Podium Computer in CoreB supports MiraCast technology. This means you can send video and audio wirelessly to the projector and TVs in our conference room.
In this setup, you will:
– Wirelessly via MiraCast, send your Windows10/11 Audio/Video to the Podium computer
– use Podium computer for Zoom audio/video session
– use your laptop for your slideshow in another Zoom session. – Use your laptop microphone or microphone to connect to the Podium Computer.
To connect via MiraCast, follow these steps:
- Turn on the TV in the room. You will need to press the power button at the bottom-center of the TV and press the power button on the TV Remote.
- Once powered on, you should see the Podium computer screen displayed on the TVs and projector.
- On your Windows 10/11 machine, ensure you have WiFi enabled on your laptop and press the
 Win + K keyboard shortcut to open the Connect pane. Look for your display in the Connect pane; it may take a few moments to appear, as shown below
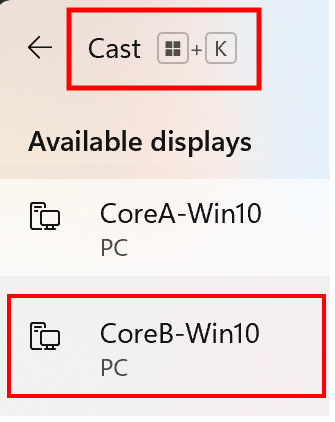
- Select Available display. In this example, we are choosing the conference machine.
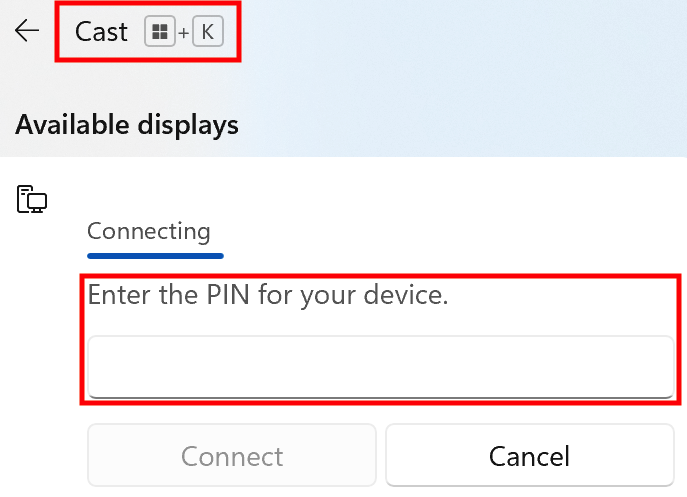
- A PIN will be displayed on the screen. Enter the PIN. If you don’t see a place to enter the PIN on your laptop, press the Win + K keyboard shortcut to open the Connect pane again.
- Once connected, your audio/video laptop is sent to the Podium computer.
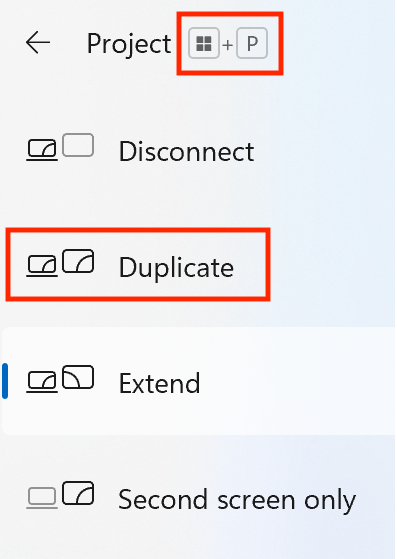
- If you want to change how to use the display, press the Win + P keyboard shortcut to open the Projection pane as shown below and pick how you would like to use the display
- When you’re finished with the display, reopen the Projection pane again using the Win + P keyboard shortcut and press the button or go to the top/center Status pane and click on the button.
- Using MiraCast, the top/center of your laptop screen will show the Status pane of your MiraCast connection. If you want to hide it, click on the
 pin icon as shown below.
- Turn on the TV in the room. You will need to press the
Wiring your Your Laptop with Conference Room TV or Projector
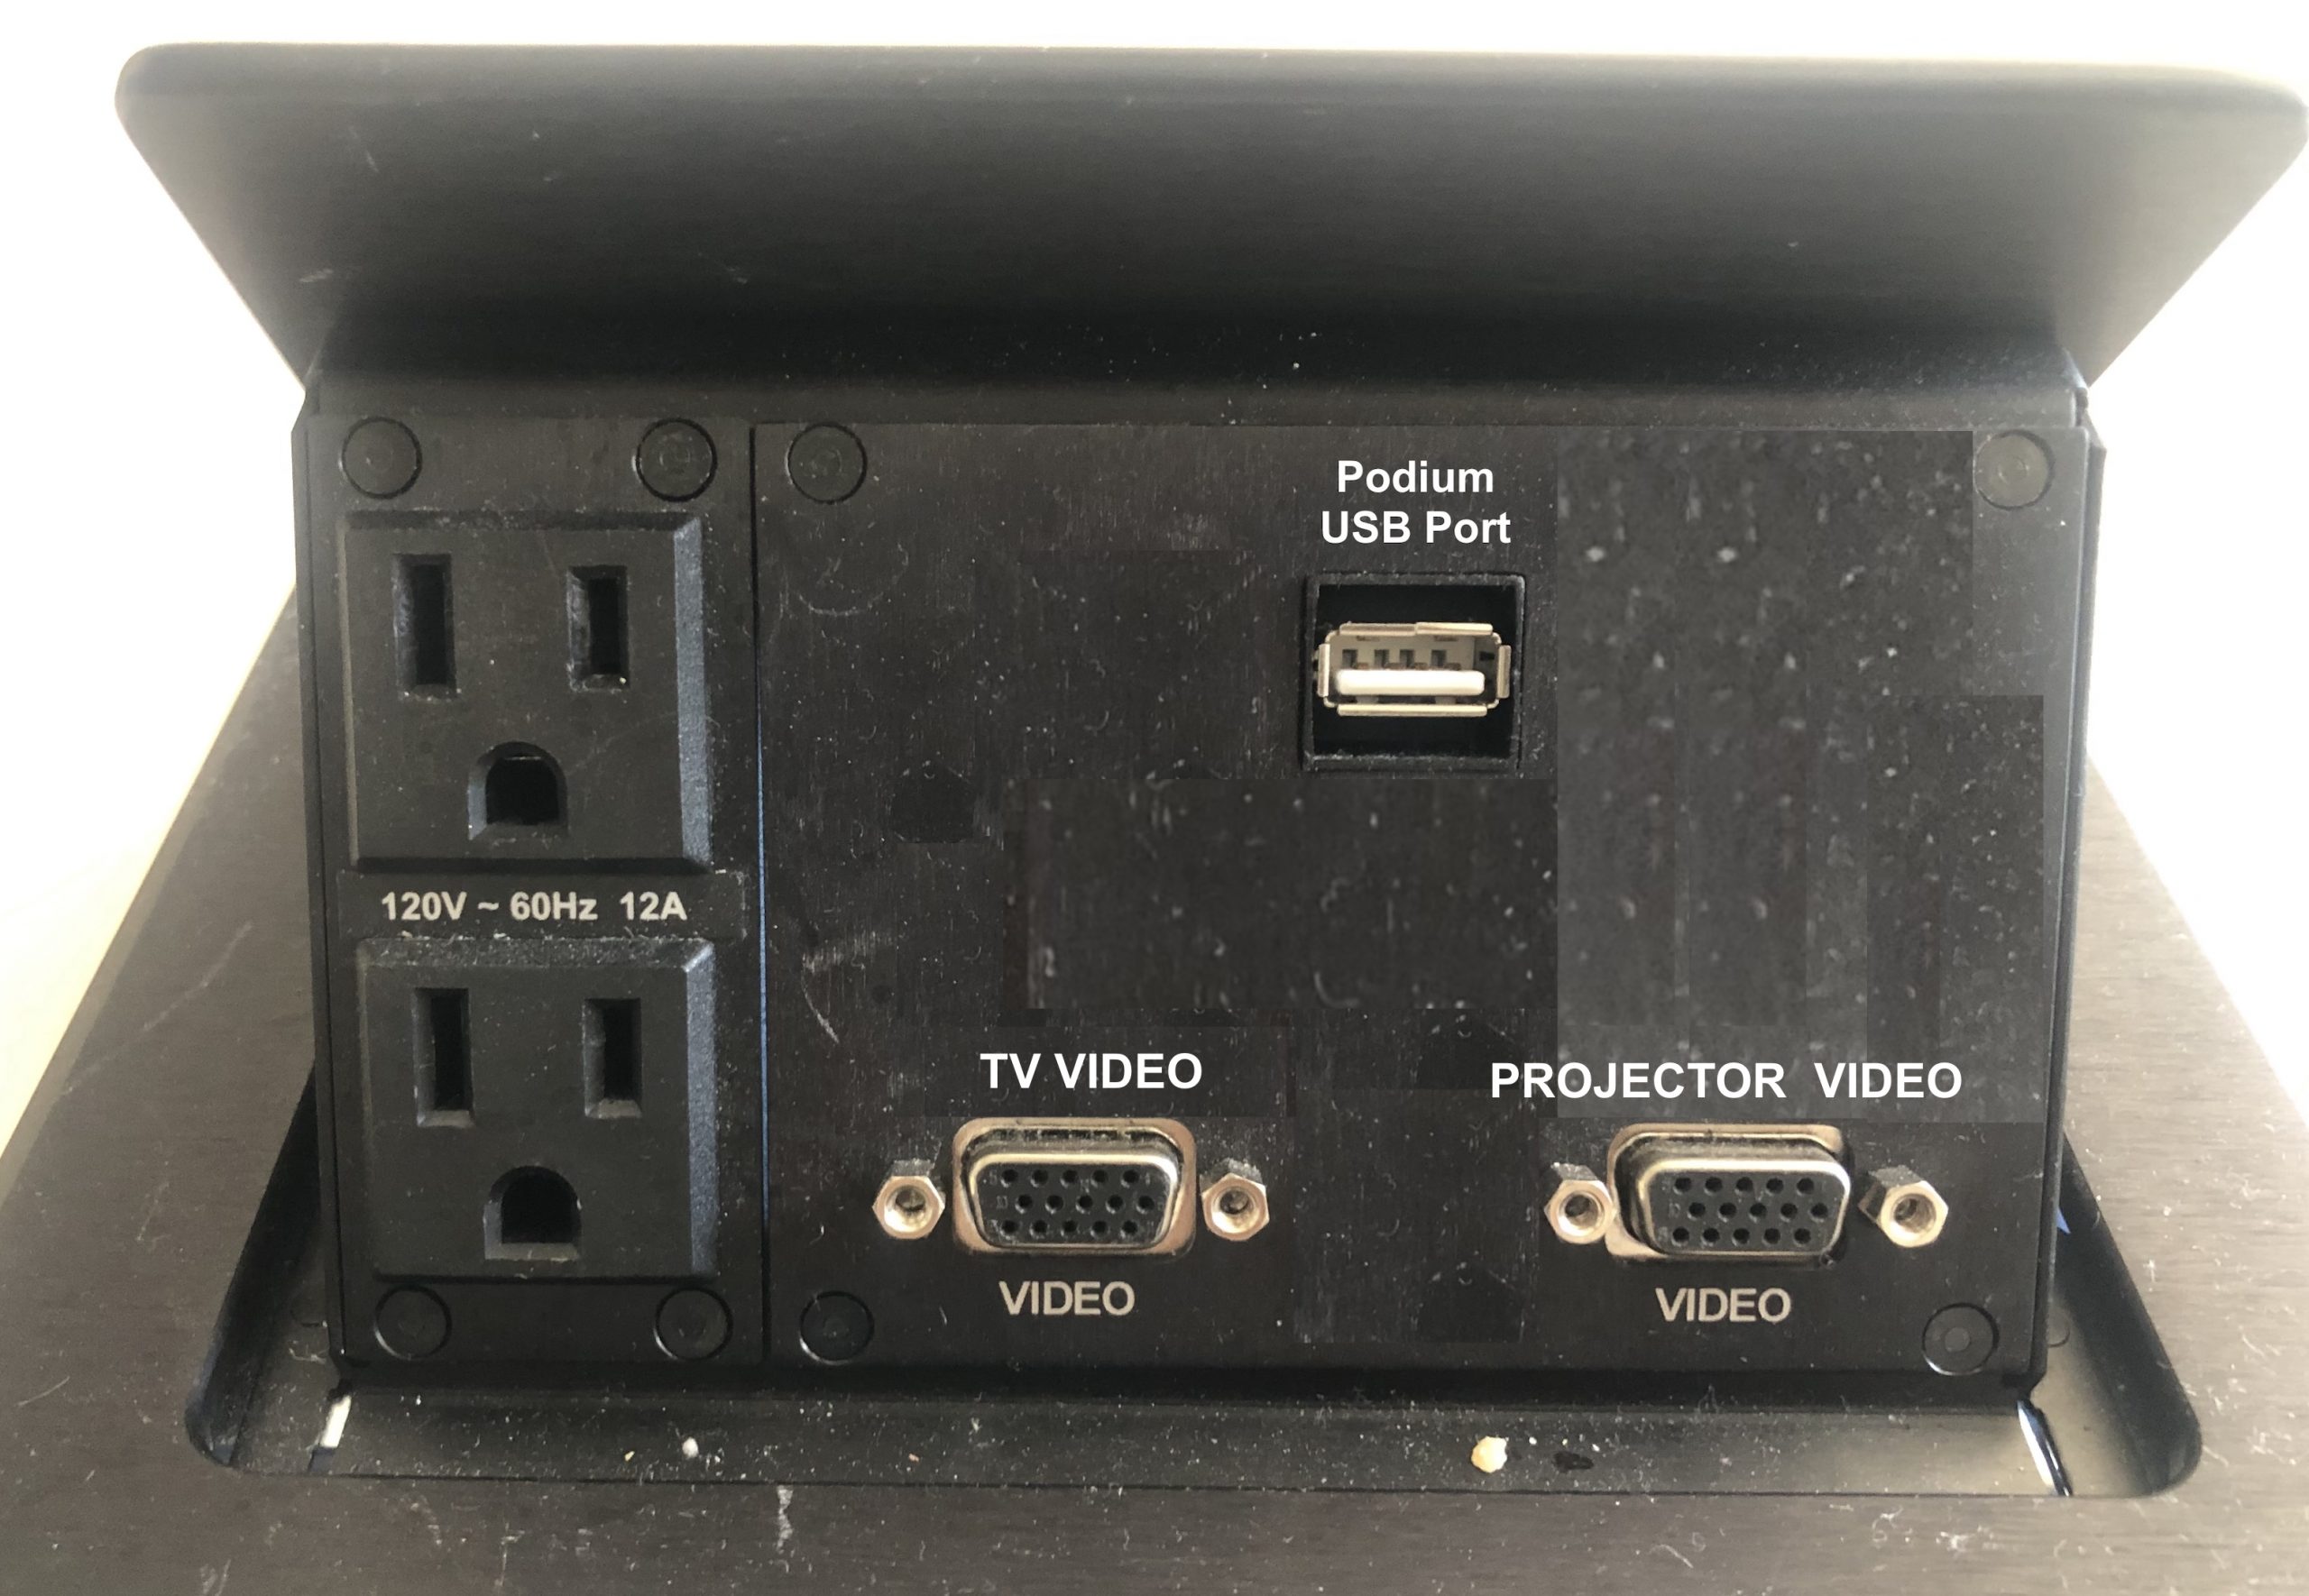
If you choose to use your own laptop and directly connect it to the TV or Projector in the room, we have installed a panel on top of Core B conference table. The panel has 1 USB port connected to the Podium computer and 2 VGA Video Ports shown below.
If you want to connect your laptop to the:
– TV, plug it to the TV Video jack, then use the TV remote to choose the TV INPUT.
– Projector, plug it to the Projector Video jack. If necessary, use the projector remote to choose the Projector video input.
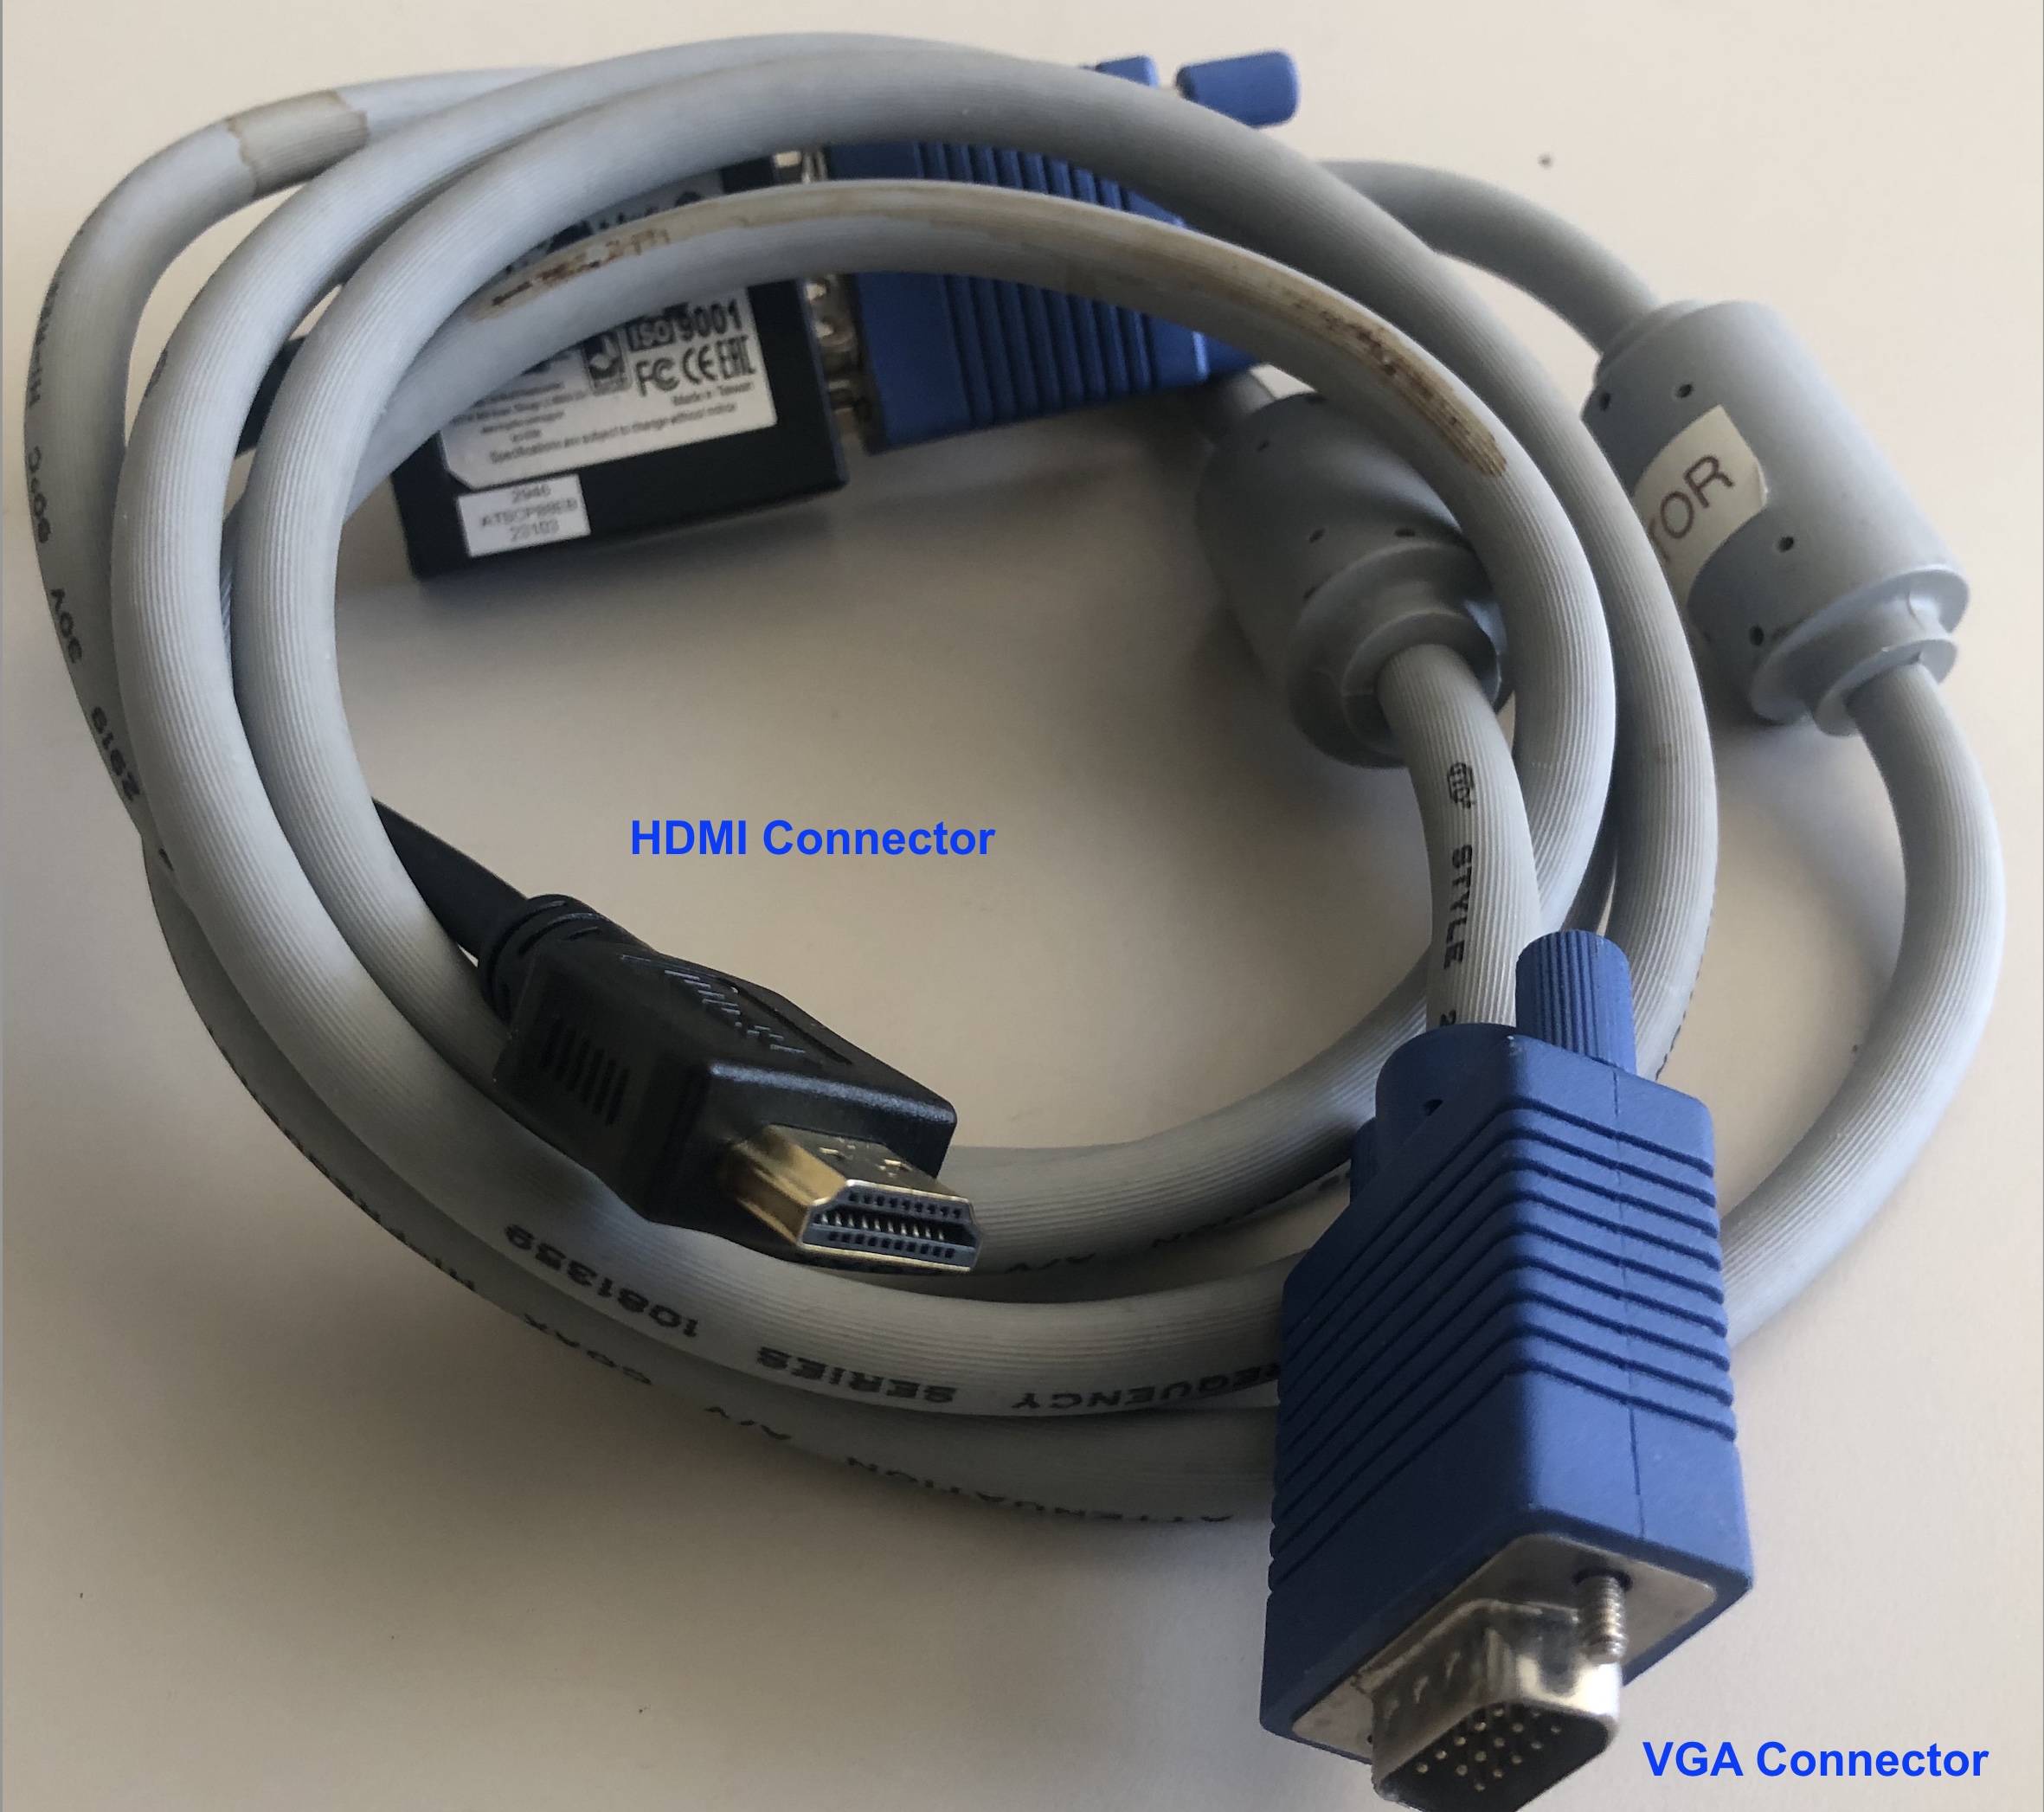
HDMI-VGA Adapter Cable
If your laptop has HDMI output, use the HDMI-VGA cable on the table to connect your laptop to the TV or to the Projector. The VGA part should be connected to the panel and the HDMI part should be connected to your laptop.
Using Zoom with Core B Conference Room
To use CoreB podium computer for your presentation, you will be presenting on to the TV. These are the steps:
- Power on TV in the room. Power switch is on the bottom-center side of the TV or use the TV Remote.
- Open Zoom app from the Conference computer and join your Zoom Meeting. Zoom will automatically use the Camera on top of the TV and Mic on the table.
- You may choose to present using the Conference room computer or optionally present using your laptop.
- Power on TV in the room.
Presenting using Your Laptop with Zoom (recommended)
To use your laptop to present to people in the room and Zoom attendees,
- Connect your laptop to the same Zoom link as attendees.
- Mute your laptop Microphone because you will use room microphone connected to the conference room computer.
- Share your presentation windows in Zoom session for everyone to see.
- You may choose to enable your video as well so Zoom attendees can see you.
Misc Info:
Powering the TV ON/OFF
To power On/Off the TV, use the remote and point it at the “SHARP” logo on the lower righthand side of the screen. Alternatively, you can push the ![]() power button at the bottom-center of the TV.
power button at the bottom-center of the TV.
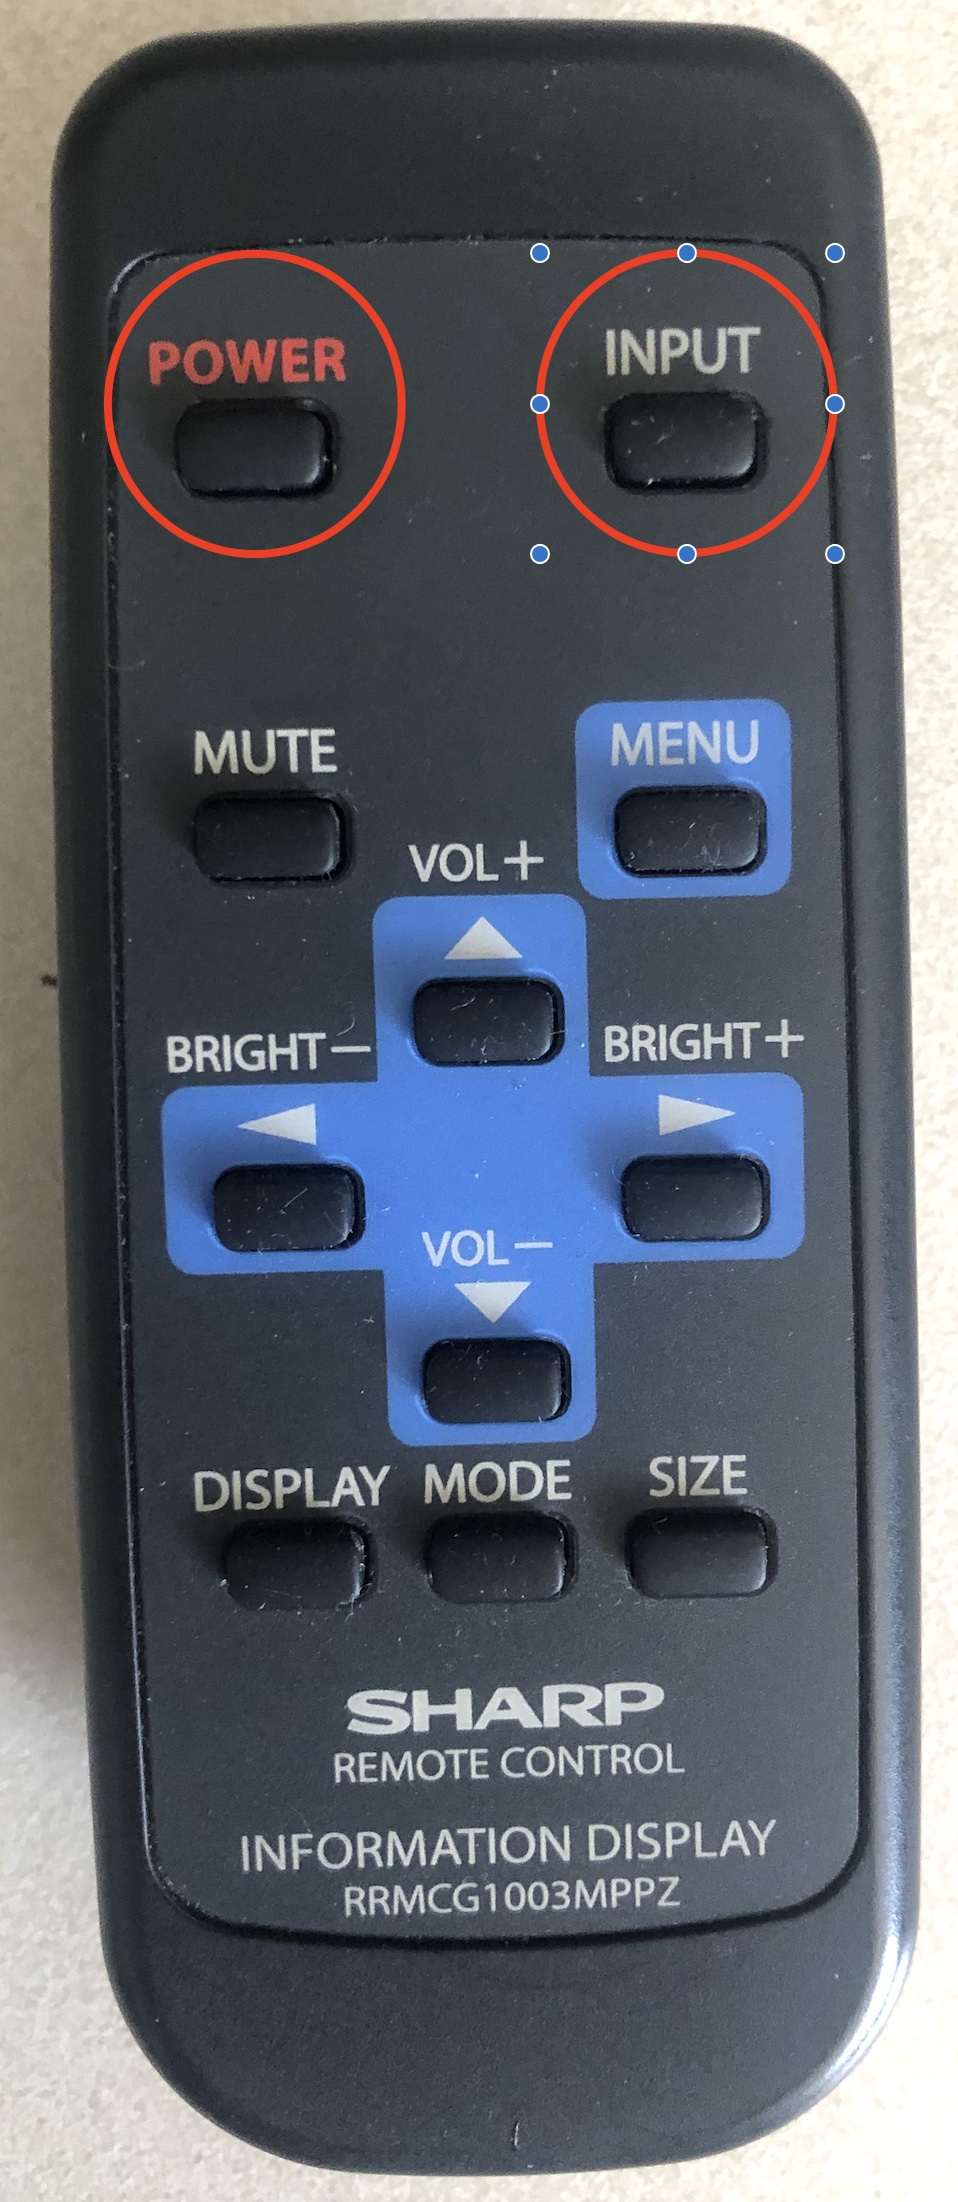
Choosing TV Video Input On the Remote
The TV by default should be connected to the Podium computer. If you prefer to set it to the projector, use the TV Remote, point it to the SHARP logo and click on the INPUT button until you get the correct video.
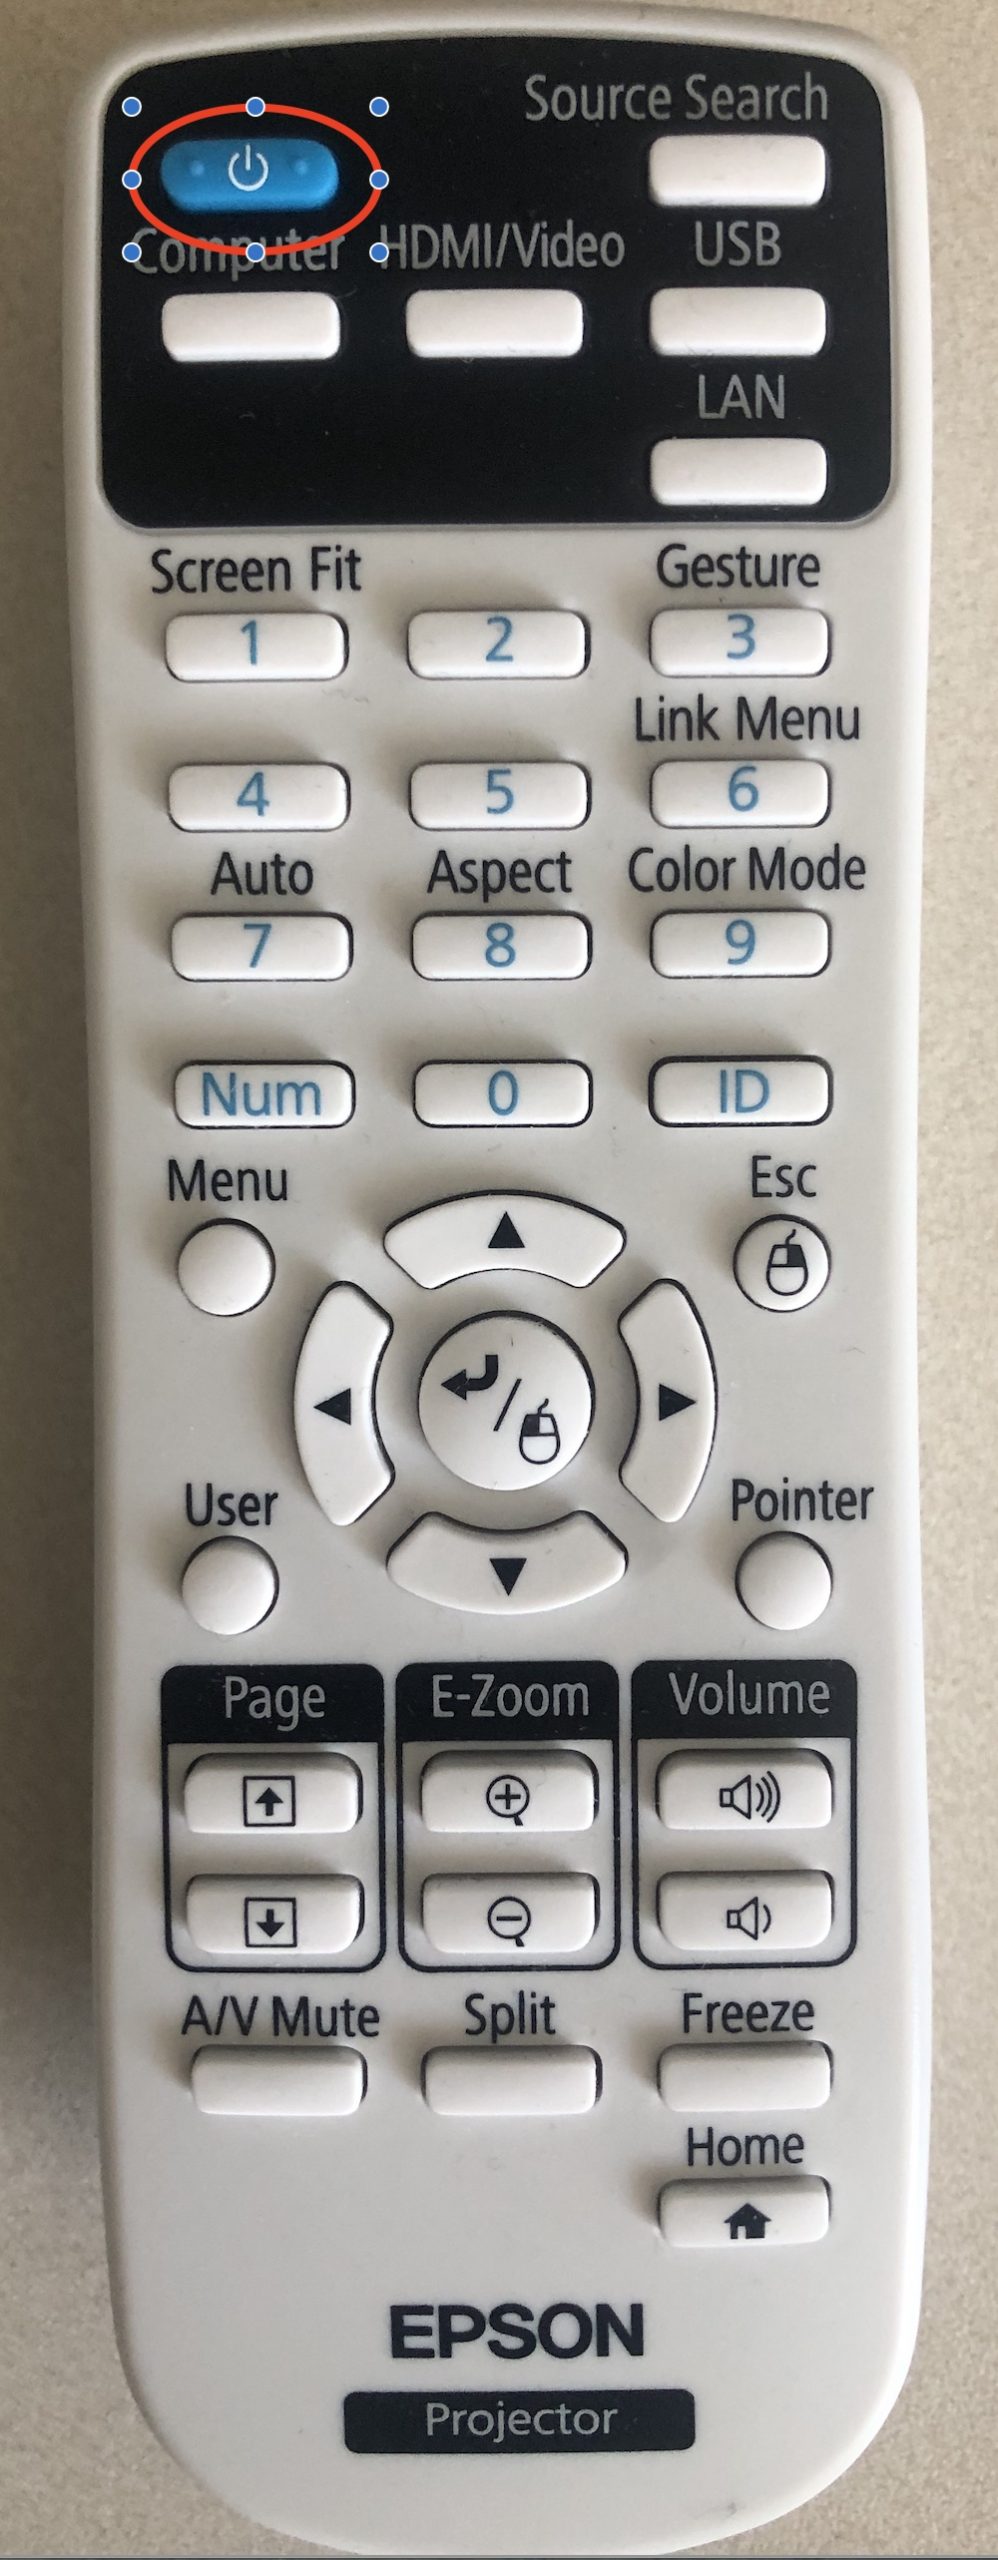
Powering the Projector ON/OFF
To power On/Off the Projector, use the projector remote in the room and point it to the projector then push the ![]() power button at the bottom-left of the remote. You will hear a beep when the projector received the command.
power button at the bottom-left of the remote. You will hear a beep when the projector received the command.
Microphone
There are at least 3 microphones in the room.
 Theere is a microphone in built in the Logitech camera on top of the TV.
- There is a mic on the Podium computer.
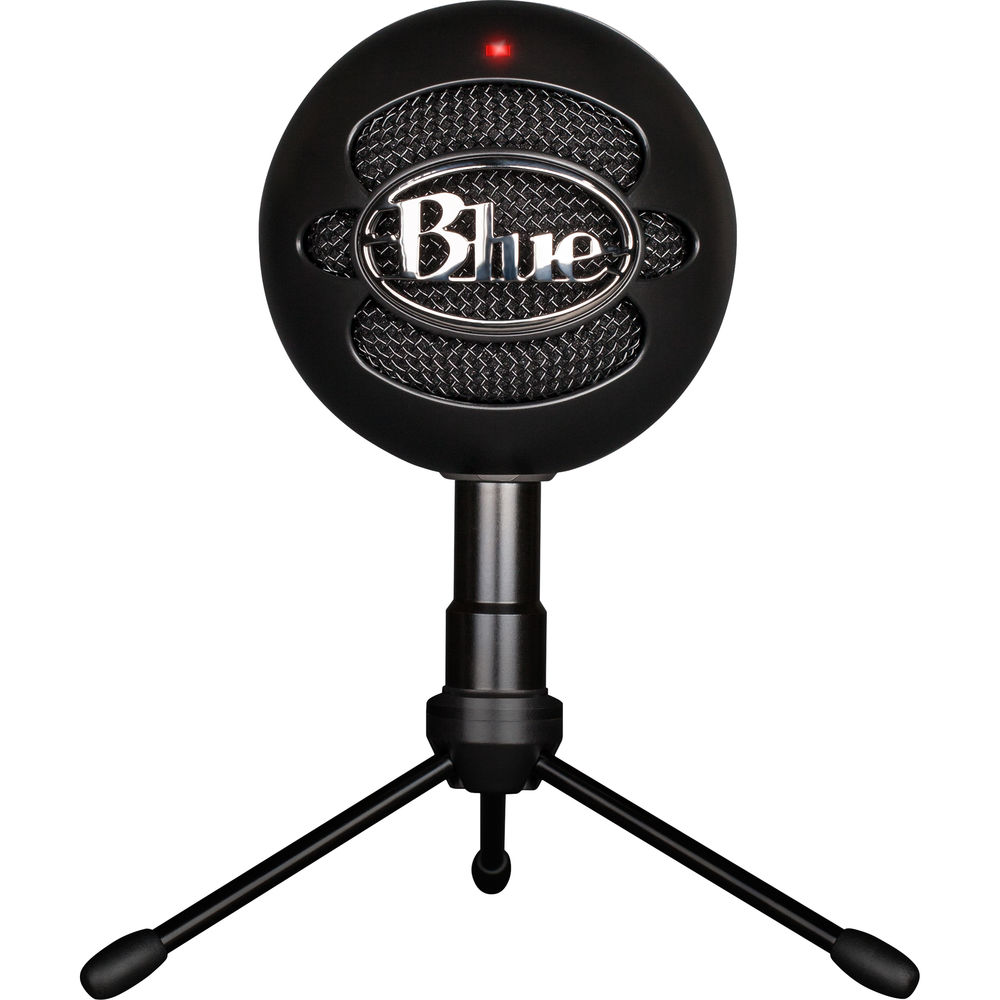
- There is a USB ‘Blue Snow Ball’ mic which siton the conferencing table. This mic can be plugged to the USB Port on the panel if you want to use it for the podium computer or plugged to your laptop. Once plugged, you will need to select the microphone to use as Mic input from Zoom, Skype (or any other application that can address a the mic).
Camera
The Logitech USB Camera mounted above the TV and built-in camera on the podium computer are usable by Zoom, Skype (or any other application that can address a usb camera.)
Touchscreen
Both the TVs and the podium computer is equipped with touch screens. The touchscreen treats touch events as mouse events, including taps as left-mouse-button. The TV us equipped with stylus has left and right mouse buttons built in — you should familiarize yourself with which is which.(see “USE THE STYLUS”, below)
Use the Stylus with the TV
While the touchscreen will work (partially) with one’s finger as a point-click device, we recommend you use the stylus. This always seems to work, and has left and right mouse buttons built in. (Your finger works, but not for everything — such as dragging windows. We’ve just found using the stylus is less effort in the long run.)
There is also a popup keyboard (the control for it peeks out from the left hand side of the display), but the old-fashioned one was just easier in our experience.
Recalibration of TVs touch Scree
If the stylus-screen synchronization is incorrect (this may occur if other devices are connected to the screen and change that synchronization, or the screen image is moved around with the remote), you may have to recalibrate.
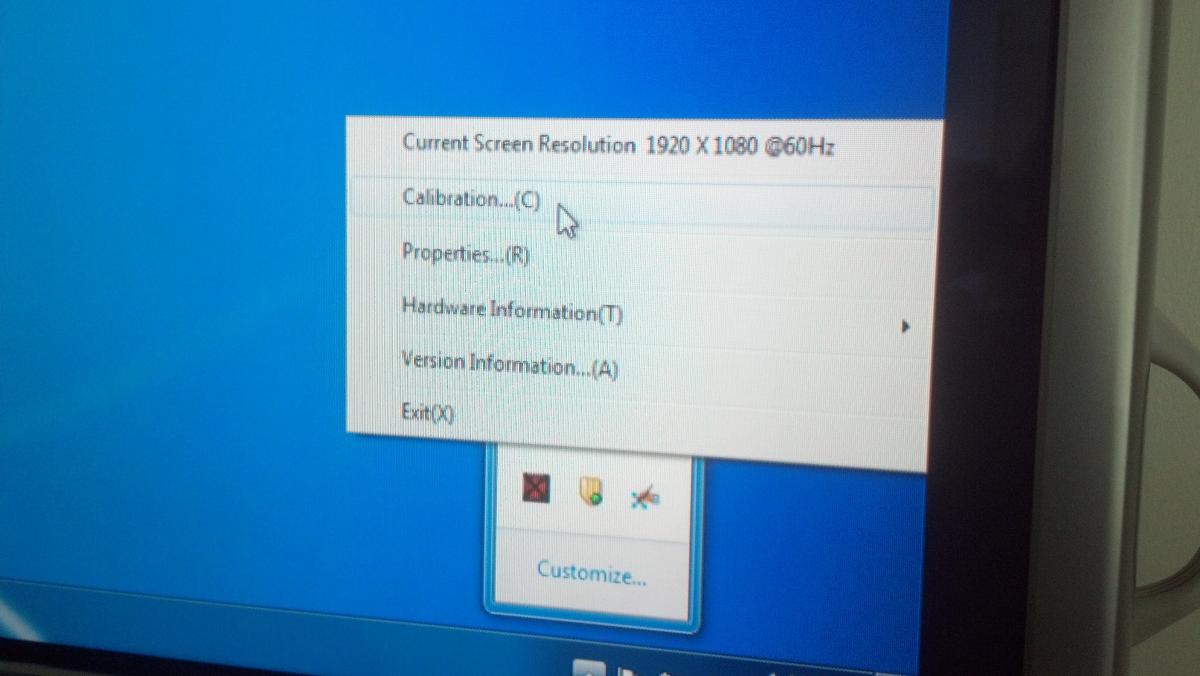
- Open (with the mouse, if necessary) the popup quick-menu thingie in the lower left of the screen.

- Select the “Set Touchpanel Utility Setting” popup
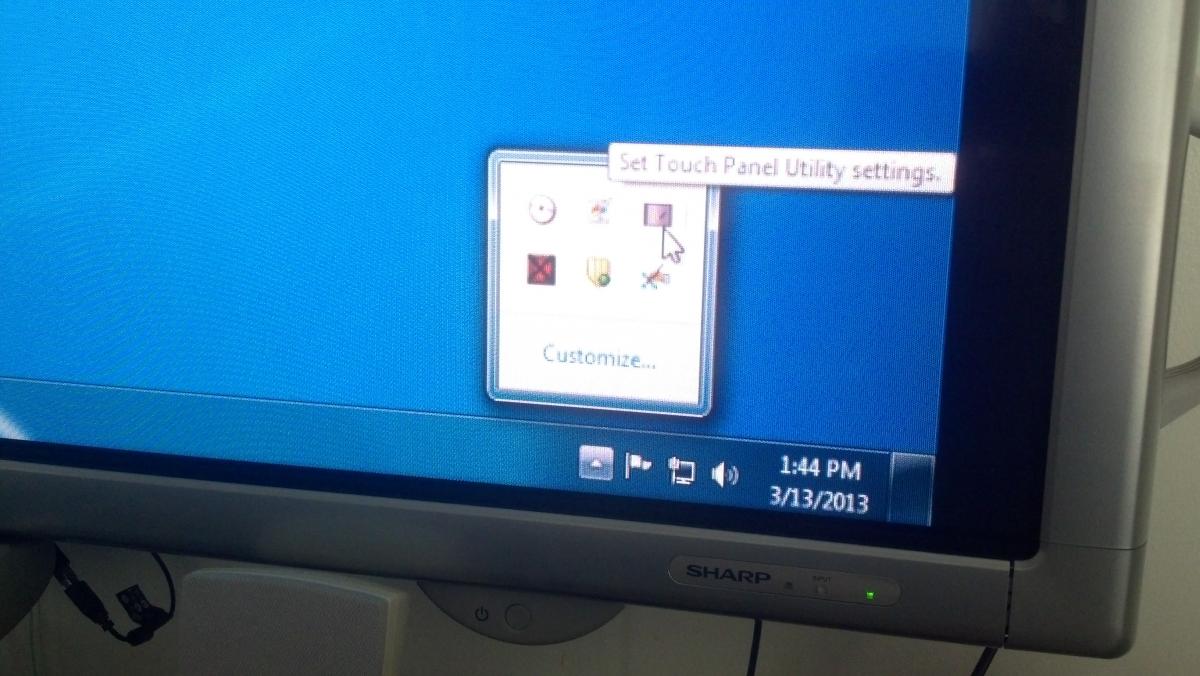
- From that popup, select “Calibration”
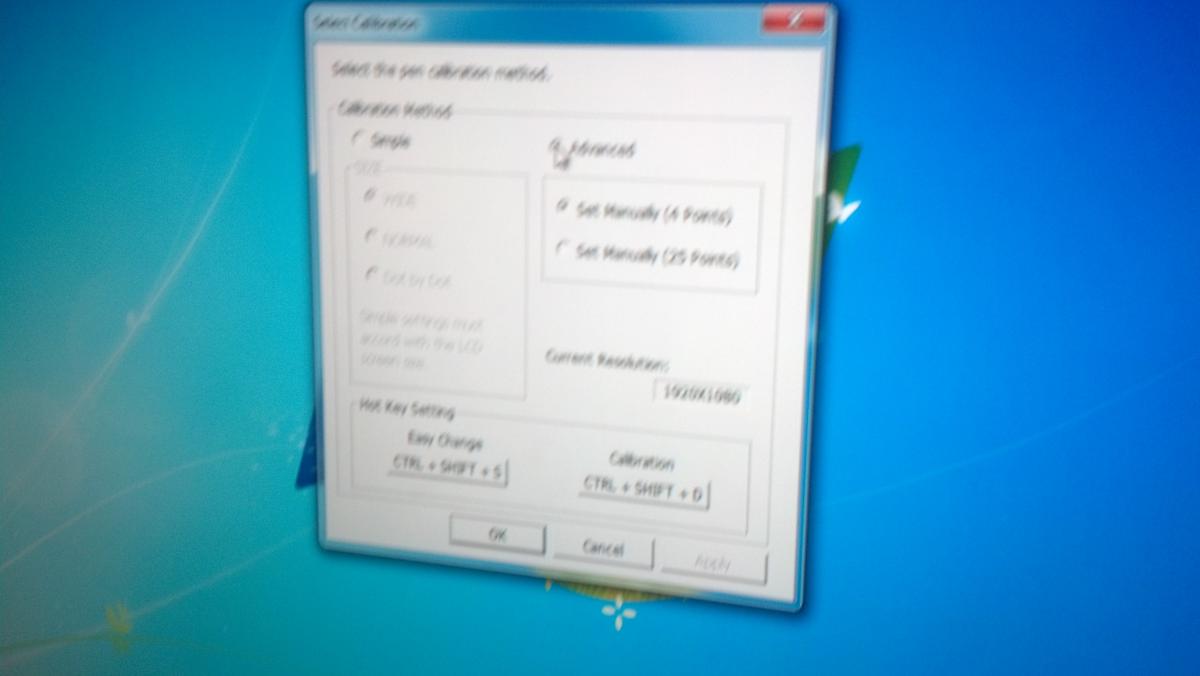
- From the “Select Calibration” popup, Select “Advanced”
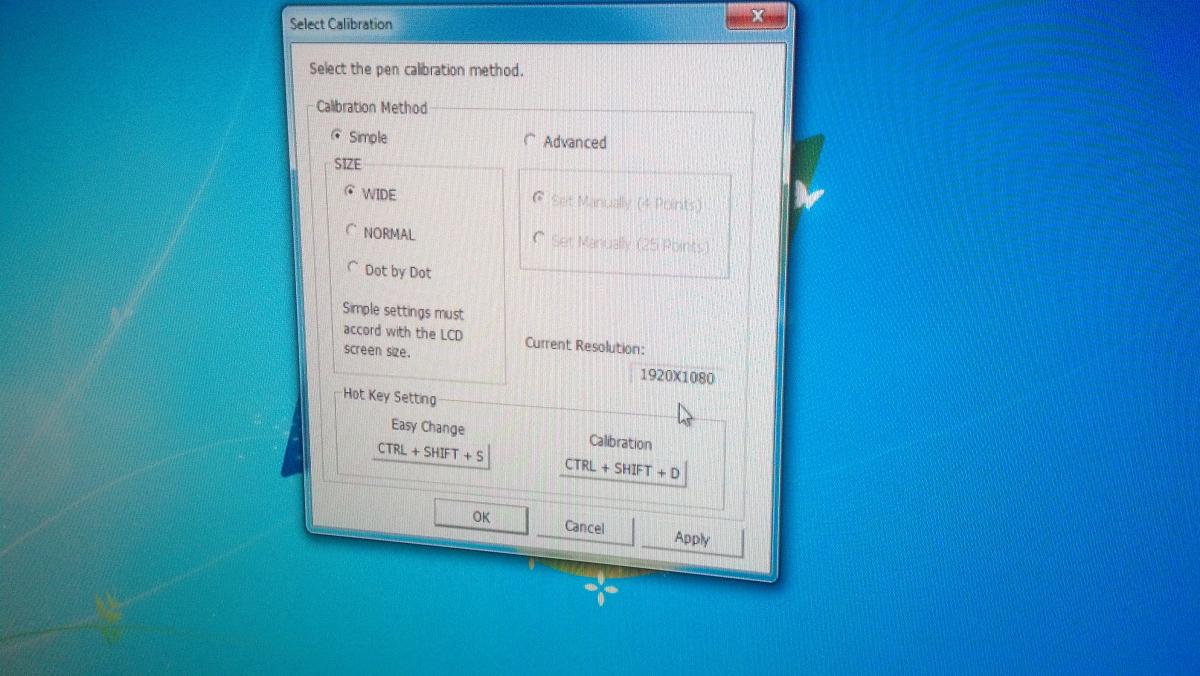
- Select “Set Manually (4 points)
(We find 4 points, rather than the more laborious 25 point calibration to be sufficient.) - A touch-me cross will appear in the upper right corner.
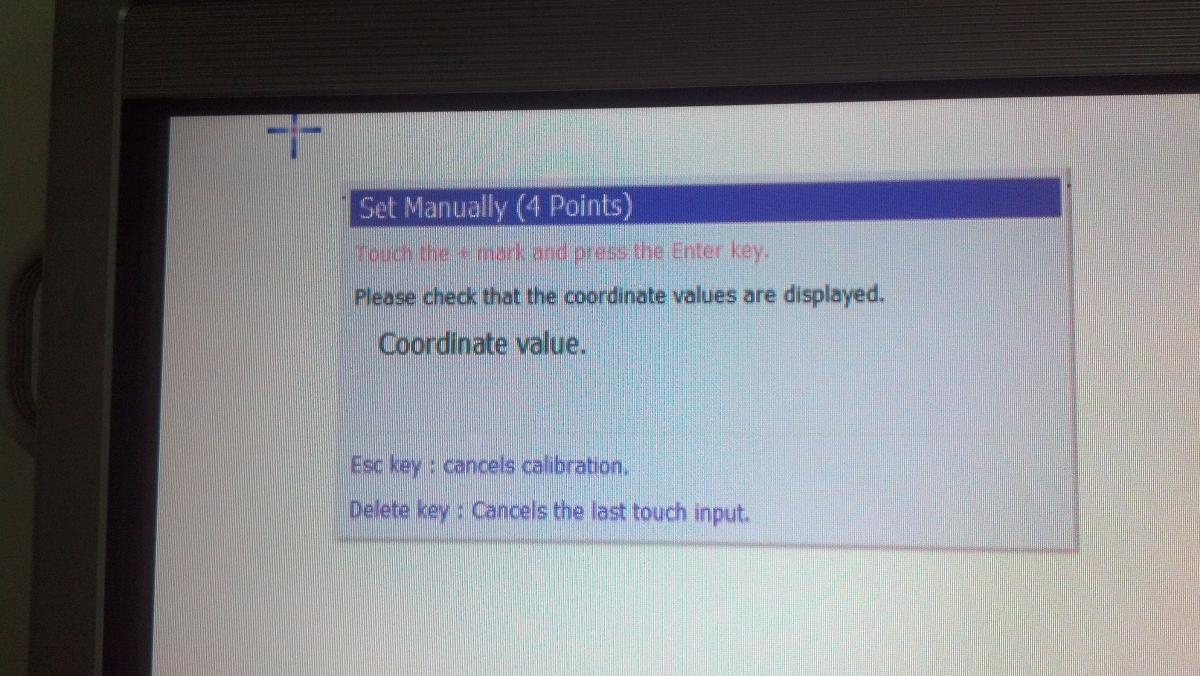
Use the stylus to touch and hold at the point. A little countdown will appear in the “Set Manually” window. When the countdown is finished, the next point will appear. (Each is in one corner.) - When all four are done, select “Apply”
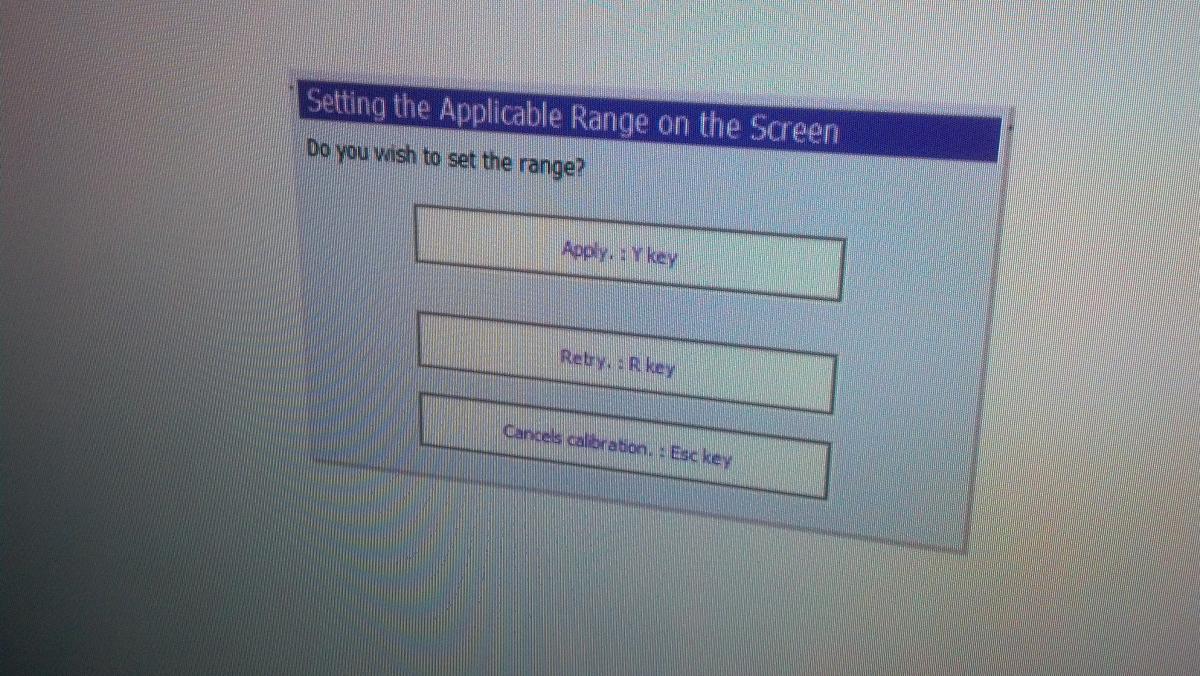
- Done
- Open (with the mouse, if necessary) the popup quick-menu thingie in the lower left of the screen.
For help with our systems or If you need immediate assistant, visit LCSR Operator at CoRE 235 or call 848-445-2443. Otherwise, see CS HelpDesk. Don’t forget to include your NetID along with descriptions of your problem.
