Note, This printing method is no longer supported as of Summer 2026
Printing using IPP to CS Printers on WindowsOS
by Hanz Makmur
WindowsOS supports Internet Printing Protocol known as IPP. This document will describe how to print using IPP on WindowsOS. To set up a printer queue using IPP, follow these steps.
Important: Ensure you do this as a user with administrative rights and are on RUNet.
Add a printer for :
WindowsOS 11:
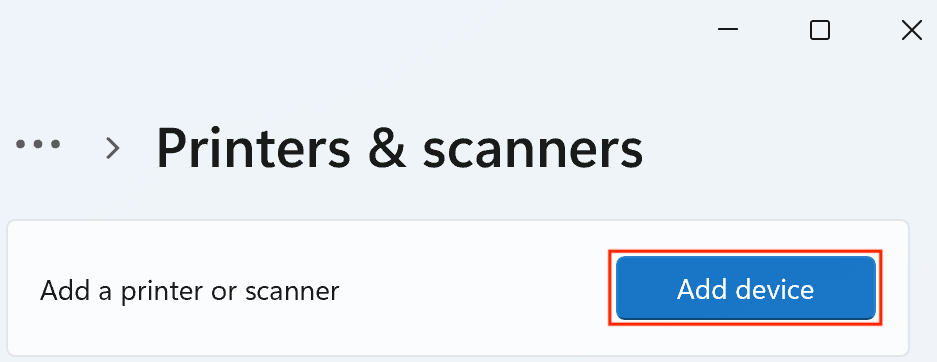
- To add a printer or scanner, press
 Win, search for add the printer as shown below, and select Add a printer or scanner
- This opens a new dialog window with the option to add a device as shown. Click on button to start adding a printer.
- Adding a device will search for available local printers and a few seconds later, an option ‘The printer that I want isn’t listed”.

- Click on to open Find a printer by other options windows as shown. Click on Select a shared printer by name option.
- In this example, we will setup core3 printer. Enter the address of core3 printers as:
https://printserver.cs.rutgers.edu/printers/core3
- Click the button to continue. Windows will connect to the address provided and open Add Printer Wizard windows when successful as shown.
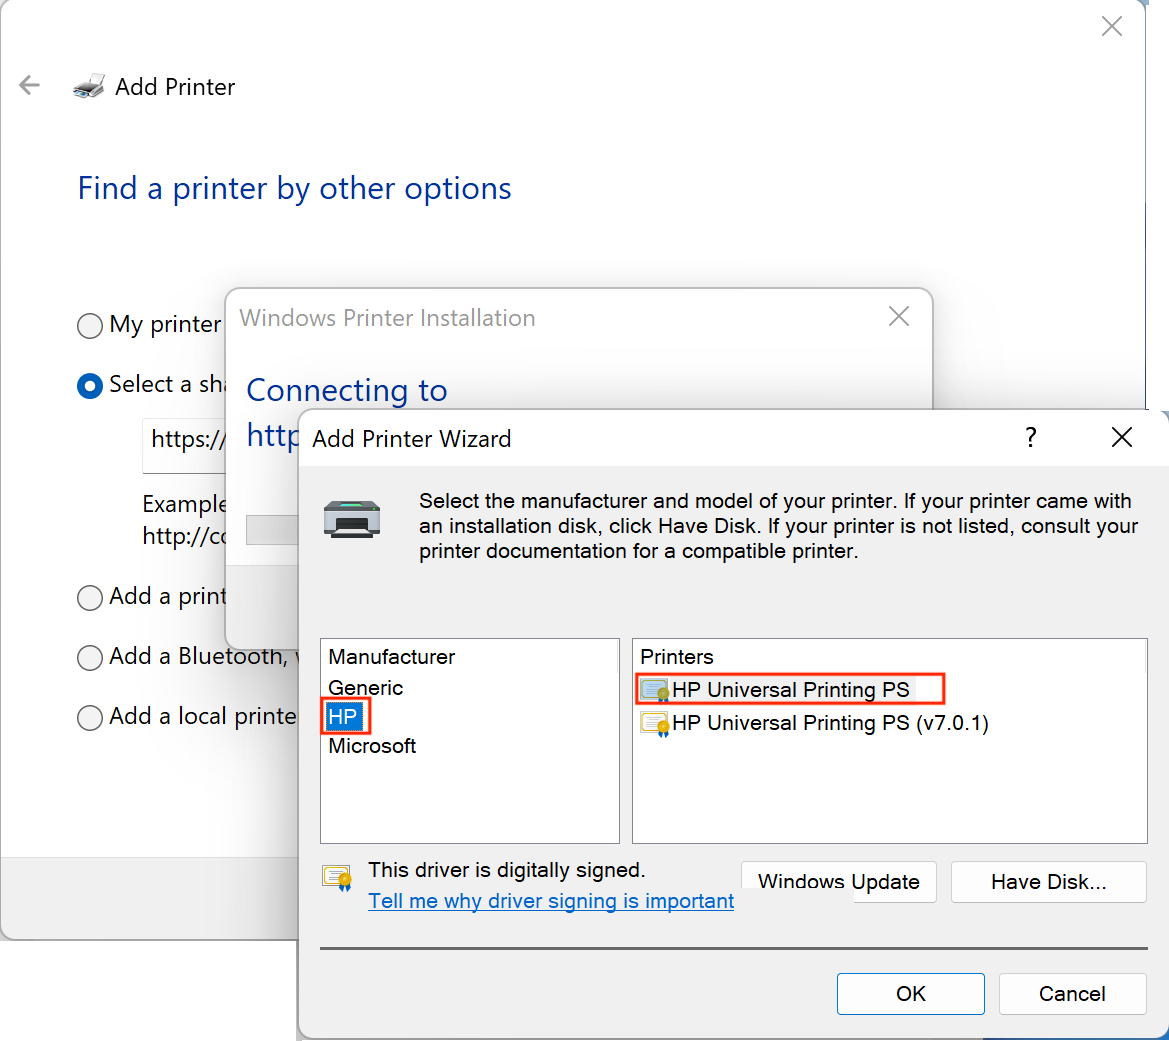
- In this step, Select HP as Manufacturer of the printer which will then show available Printers drivers. Select HP Universal Printing PS and click button to continue.
- On a successful setup another window will open as shown.

- Repeat these steps to add other printers as needed.
- To add a printer or scanner, press
WindowsOS 10
- To add a printer press
 icon and search for: printers & scanners as shown
- On top of the menu, click on Printers and scanners search result as shown above to open Printer & Scanner window
- In the open Window, click on Add a printer or Scanner. Windows will start Searching for printers and scanners. After a few seconds, will show.
- Click on to tell WindowsOS you want to setup the printer manually.
- In this example, we will setup core3 printer. Enter the address of core3 printers as:
https://printserver.cs.rutgers.edu/printers/core3 - Click the button to continue. Windows will connect to the address provided and open Add Printer Wizard windows when successful as shown.
- On a successful setup another window will open as shown.
- Repeat these steps to add other printers as needed.
- To add a printer press
Note on Printing Test Page
Except for the poster printer, artisan, after setting up your printer driver, please send 1 simple test page to the printer to make sure your setup is correct before sending a job.
Limitation: All laser printers have a maximum of 50 pages/job.
Checking your print jobs
To check if your print job is printed, make sure the jobs have left your computer local print queue. Once it left your computer, open a browser to printserver.cs.rutgers.edu
For more info see list of Computer Science Public Printers page.
