Running Virtual Machine via KVM on CS Machines
by Hanz Makmur – Oct 04, 2021
We have enabled KVM (Kernel-based Virtual Machine) software on all CS Desktop Machines to allow users to learn how to set up and manage their operating systems. (not servers). This instruction will guide you on how to set your VM using KVM.
Set up Your First Virtual Machine using KVM.
Log in with a graphical user interface (GUI) to set up your virtual machine using KVM. This can be done by logging in front of the machine, WebLogin or Windows Remote Desktop.
Running Virt-Manager
Once on a GUI-based session, open a terminal window and type virt-manager. Virt-manager is the virtual machine manager used to control virtual machines run under KVM.
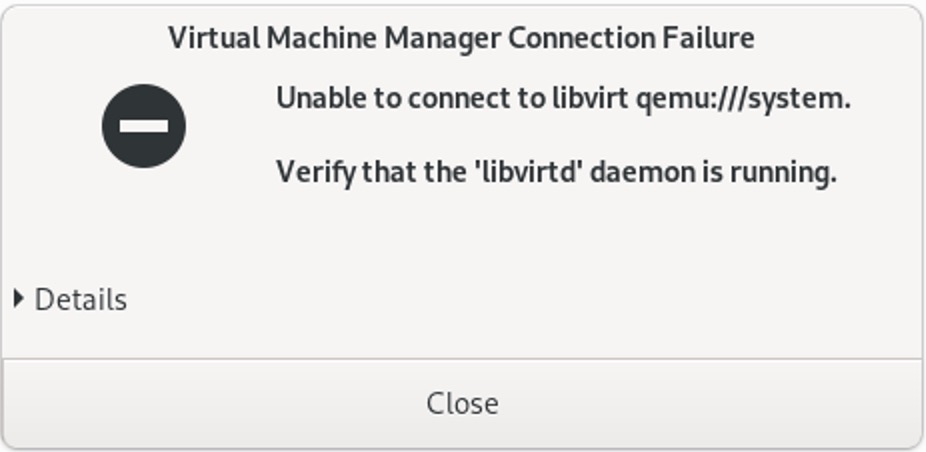
Note: If this is your first time running virt-manager, it will look at existing system VMs by default and open a dialog box, “unable to connect to qemu://system,” as displayed below. You can ignore this message safely by clicking on it. button.
Add a Connection for User Session
By default, KVM runs in restricted space. On all CS iLab machines, we have enabled access so users can run KVM in user space. This change requires user to tell KVM to watch for user space connection.
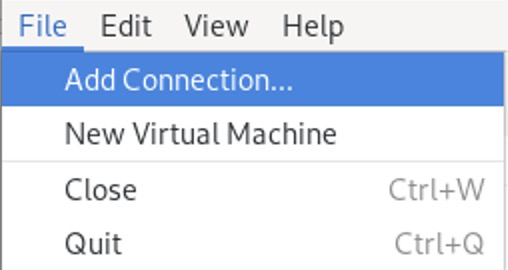
To create a Connection for User session, pull down menu and select , choose in the list.
![]()
Note: You will get a warning saying “QEMU usermode is not the virt-manager default…” You can safely ignore this and click on button.
This only needs to be done the first time you use virt-manager.
Setting up a New Virtual Machine
To setup a VM, follow steps below. It is a bit complicated but so it is detailed below.
Step 1. Creating a New Virtual Machine.
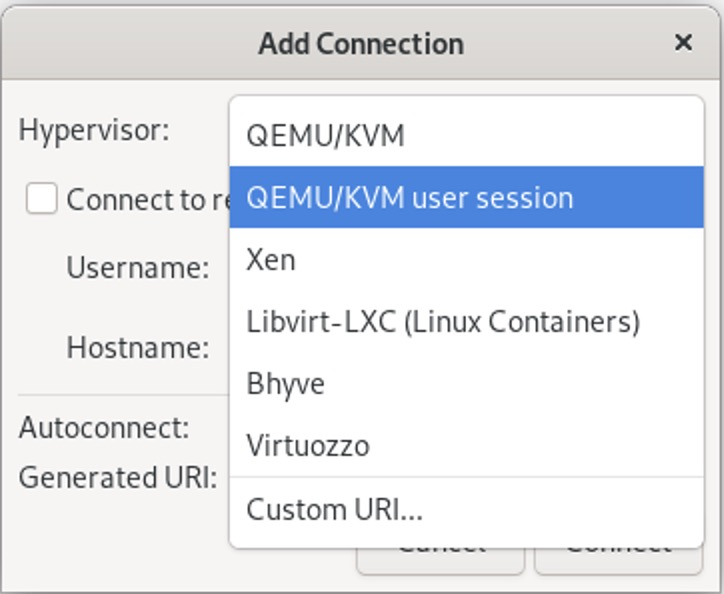
To setup a new virtual machine, pull down menu and select menu.
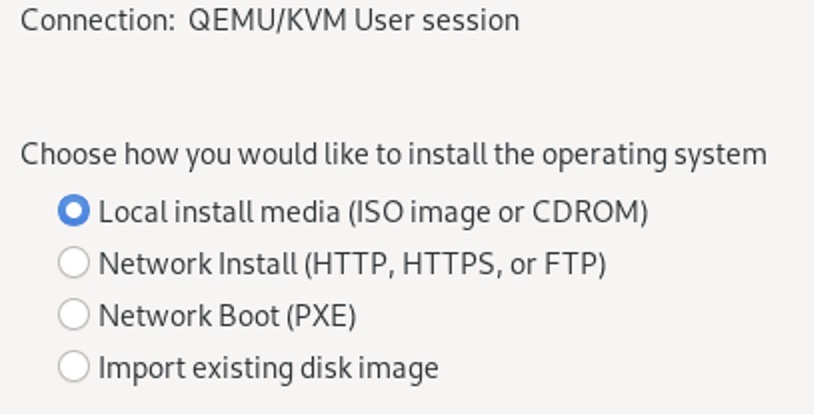
Step 2. Tell KVM your Media Option
Pick Local install media (the default) and click button
Step 3. Tell KVM Location of your CDROM ISO file
In the field for CDROM install media, click on button which will open up Choose Storage Volume window.
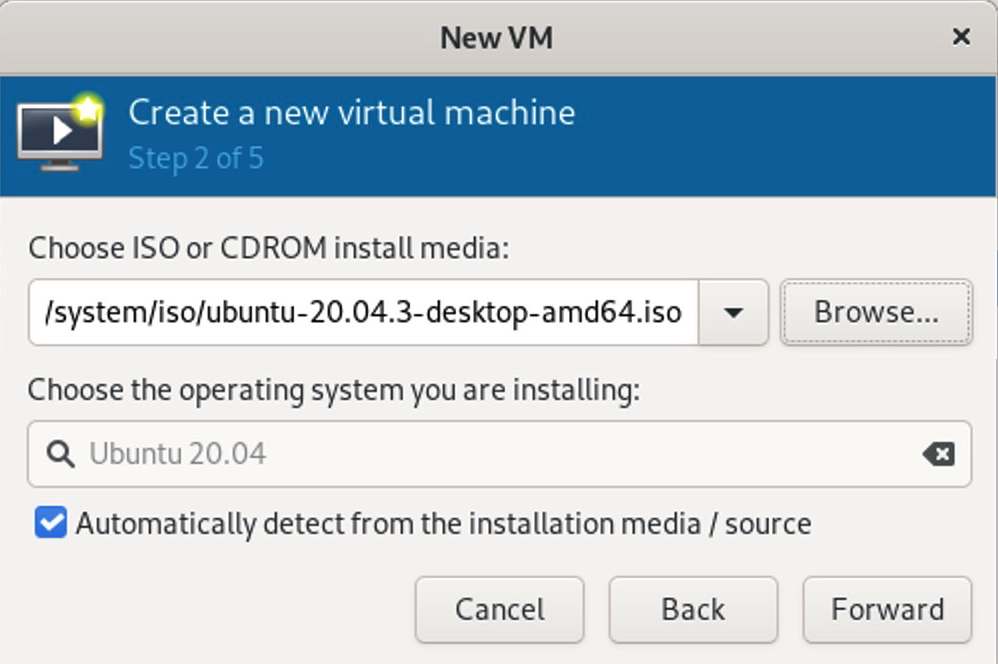
Step 4. Choose your ISO.
At the bottom of Choose Storage Volume, click button.
![]()
At the top, in the bar where it shows the directory, For this example, we will use Ubuntu 20.04. Click on the ,then click , then click then click and select and click on the button. Ubuntu 20 should now show in the CDROM file as shown below. Click button to continue.
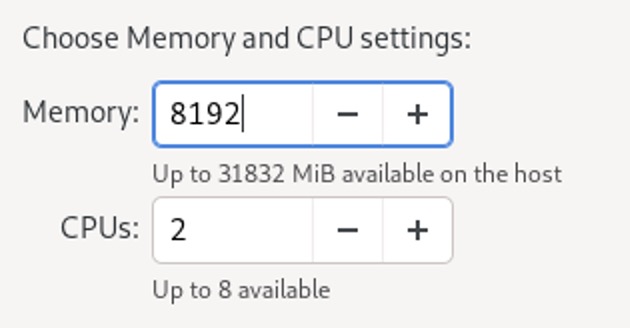
Step 5. Adjust Memory and CPU Settings.
Set the memory for your VM to MB (8GB) and CPU to , you can increase to 16 if you are in iLabU 1- 4 which has more memory. Click button to continue .
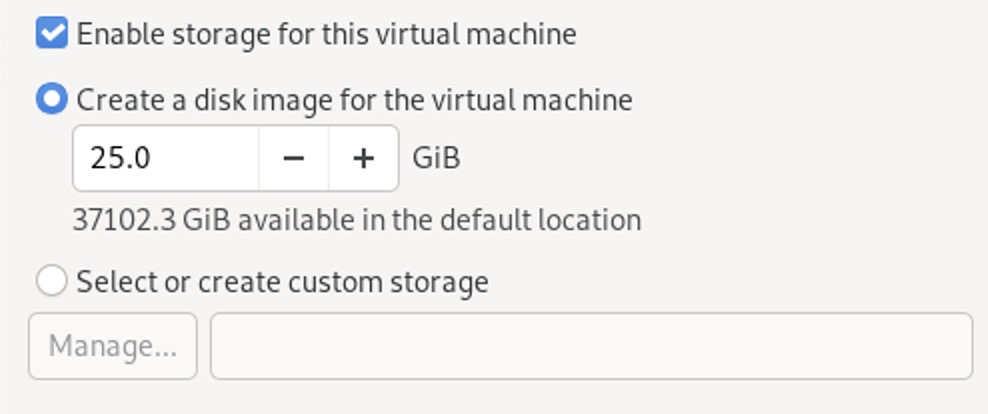
Step 6. Set your disk size
Set your disk size to . This will give you about 16GB of disk space to play with after the OS is installed. If you need a bigger storage, you’ll want to create custom storage in /common/users/your_netid.
click and button to continue.
Step 7. Installing Ubuntu.
Virt-Manager will now setup your VM and run it. A screen where you can install Ubuntu will show up. You’ll want to expand the size of that window to see it better. At this point you can go through a normal Ubuntu install. Take the defaults unless you know what part of the OS you want to customize.
Step 8. Remove virtual CDROM image before rebooting.
When the install is finished, before you click you need to remove the virtual CDROM, or it will boot back into the install screen.
At the top of the KVM window, pick and then as shown below.
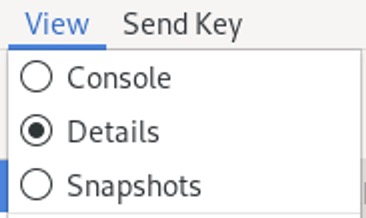
A detail window will open. In the left margin, you’ll find . Choose it with the mouse and clear the source path by clicking on the backspace icon next to the ISO path as shown below then click the button. ![]()
Step 9. Reboot the VM.
Now you can pull down menu and select and let the machine reboot
It will tell you to remove the CDROM and hit . You’ve already removed the cdrom, so hit key on your keyboard.
Upon Reboot, you have your own copy of Ubuntu where you can become root.
Exiting Virt-Manager
When you finish using your virtual machine, please shutdown the machine first. To exit Pull down Virtual Machine menu, choose and then select If the VM hung, you need to to fully shutdown your VM totally.
Running Your VM
When you want to use the VM system again, open a terminal window and type: virt-manager. Click on virtual machine you want to run in the menu. Once the console opens, Click on icon on the bar above the window to start it.
Important Notes:
- Please shutdown the machine when you’re not using it.
To shutdown, pull down menu, choose and then select . If the VM hung, you need to to fully shutdown your VM. - A default VM install goes in
.local/share/libvirt/imagesThis can grow. When you create the VM it asks you how big a virtual disk you want. The default is 25 GB. It doesn’t use up your quota until space is actually used inside the VM. - On the desktop systems, please don’t allocate more than 8 GB of memory. If you use iLabU1 – iLabU4 you can use a larger VM, but 16GB should be enough for anything you’re likely to do.
- These VMs can use the internet, but you can’t contact them from the internet. That is, you couldn’t run a web server and have someone from outside contact it.
- It’s very important to shut down your VM when you’re not using it. We can’t survive a situation where our users all leave VMs running thus we Enforced Limitations on CS Machines.
