DO NOT USER. THIS IS AN OLD Instruction!
Setting LPR printer on WindowsOS Vista/7/8/10/11
Note: Before following these steps, ensure you already have Universal Postscript drivers installed on your machine.
To print using LPR mode, there are two steps to follow:
Step 1. Enable LPR support on Windows
To install LPR support on Windows Vista and Windows 7/8/10/11:
- Go to the Control Panel
- Choose Programs

- Under Program Features, choose ‘Turn Windows features on or off.‘

- If asked, enter the credential for the admin account and click Continue when prompted
- Click the drop-down box next to Print and Document Services
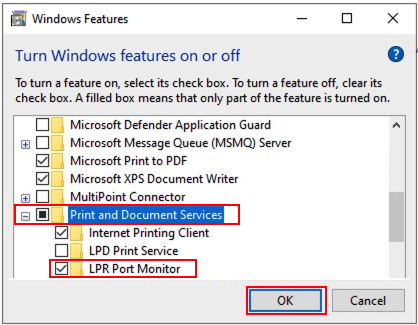
- Select LPR Port Monitor
- Click OK and wait until the LPR Port installation is completed.
Your workstation can now print to an LPR print server.
Step 2. Add LPR printer Queue.
- Add A Printer.
Depending on your Windows OS, the steps to add a printer are different.For Windows Vista/7
– Go to Start, select Control Panel, and select Devices and Drivers
– Right-click in the window that opens and choose Add PrinterFor Windows 10/11
– Go to Start, select Settings
– Under Devices, Select Printers and Scanners
– At the top of the Printers & Scanners window, click the button labeled [+] Add Printer or Scanner, and the system will search for available printers.
– click The Printer I want isn’t listed as shown below: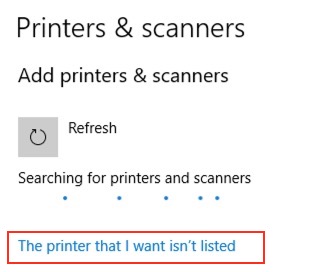
- Add a Local Printer
– A Windows will open, choose [+] Add a local printer or network printer with manual settings.
– Click next. - Create an LPR port if one does not exist yet for the printer
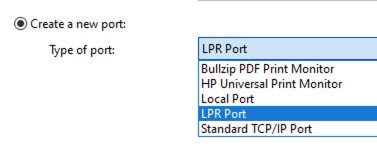
– Choose Create a new port and select LPR Port from the dropdown menu.- Click Next
- Right-click in the window that opens and choose Add Printer
- Choose Add a local printer
- Choose Create a new port:
- Select port type LPR port
- Click Next
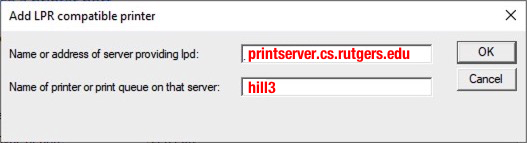
- Type: printserver.cs.rutgers.edu for server providing lpd
- Type the exact queue name you wish to print to. For example, use core3, core3c, hill3, and lp4, or see a list of available printers.
- Click Next
- Select a Universal Postscript Driver.
– Browse the Manufacturer list and choose HP
– Choose the driver under the Printer column, and look for the Universal HP Driver PS driver you just installed. Make sure you choose the PS version for the Postscript driver and click Ok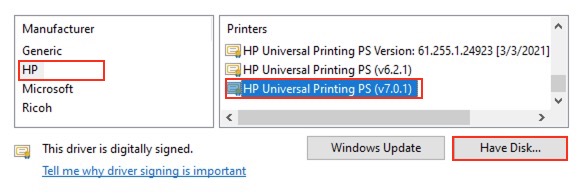
– If the Universal HP Driver is not shown, click the Have Disk… button, look at it manually in the C:\HP Universal Driver folder and let it search for the .inf file automatically.
-Name the printer something meaningful, like after the queue name. Example: hill3 in this case.
– When asked, keep the printer private. - Repeat this for every printer you want to print to.
Limitation: All laser printers have a maximum of 50 pages/job.
For more info, see the list of Computer Science Public Printers page.
